How to Use Delay Designer in Logic Pro
Make a deliberate repeat pattern with Delay Designer. Start with three independent taps, then add tone, stereo movement and one controlled feedback path.

Open a channel strip’s Audio Effect slot and choose Delay > Delay Designer. Turn on Sync, choose a grid, then click the Identification bar to place taps. Select each tap and use the parameter bar below the display for exact delay time, level, pan and tone. Keep Feedback off while you build the pattern.
I’d start with three repeats instead of filling the screen with taps. Give each repeat a job, then decide whether the pattern needs feedback at all. This guide uses the current Logic Pro for Mac controls. The iPad version has a different layout.
Understand what a tap actually repeats
Delay Designer provides up to 26 taps. Each receives the original source signal directly, with its own delay time and processing. Tap B isn’t automatically a repeat of Tap A. Apple’s Delay Designer overview describes per-tap level, pan, pitch and filtering, plus global synchronization and feedback.
That makes it useful when you want exactly three echoes, a left-to-right rhythm or a little pitched response to a phrase. You can make those repeats progressively quieter yourself. Feedback is an additional circuit, and you don’t need it to hear several taps. If you only need one regular echo, a simpler delay can be quicker to set.
Choose an insert or a shared aux
For a vocal throw or several instruments sharing one pattern, start with an aux. Choose an unused bus in the source track’s Send slot, find the receiving aux and insert Delay Designer there. The track’s main output remains the dry path, as Apple explains in its send-effects routing instructions.
On that aux, move Delay Designer’s Dry Mix slider fully down to mute it. Set Wet to an audible level, then raise the source send gradually. The two Mix sliders control dry and wet independently. They aren’t a single percentage blend.
An insert suits an effect that belongs entirely to one track. Keep the required dry level there and balance Wet against it. Avoid inserting the effect on Stereo Out unless you mean to delay the whole mix. Our buses, sends and aux guide handles the wider routing choices.
Build a three-tap pattern before adding feedback
Here’s a starting exercise. It isn’t meant as a preset for every song. Use a short note or a sparse phrase so you can distinguish the repeats. At 120 BPM, a quarter note lasts 500 ms and an eighth note lasts 250 ms.
- Save any setting you want to keep, then select unwanted existing taps and press Delete. Turn Feedback off.
- Turn Sync on, set Grid to 1/8 and leave Swing at 50% for evenly spaced grid increments.
- Click the Identification bar at the first three eighth-note positions after the source. Create them in that order so their letters are A, B and C.
- Select A, B and C separately. Check each time in the Tap Delay field, then enter the example Level values below.
- Balance the send or Wet output in the full arrangement. If the pattern obscures the next word or note, lower or remove a tap before adding more processing.
| Tap | Position after source | Time at 120 BPM | Example Level |
|---|---|---|---|
| A | 1/8 note | 250 ms | −6 dB |
| B | 1/4 note | 500 ms | −9 dB |
| C | Dotted 1/4 note | 750 ms | −12 dB |
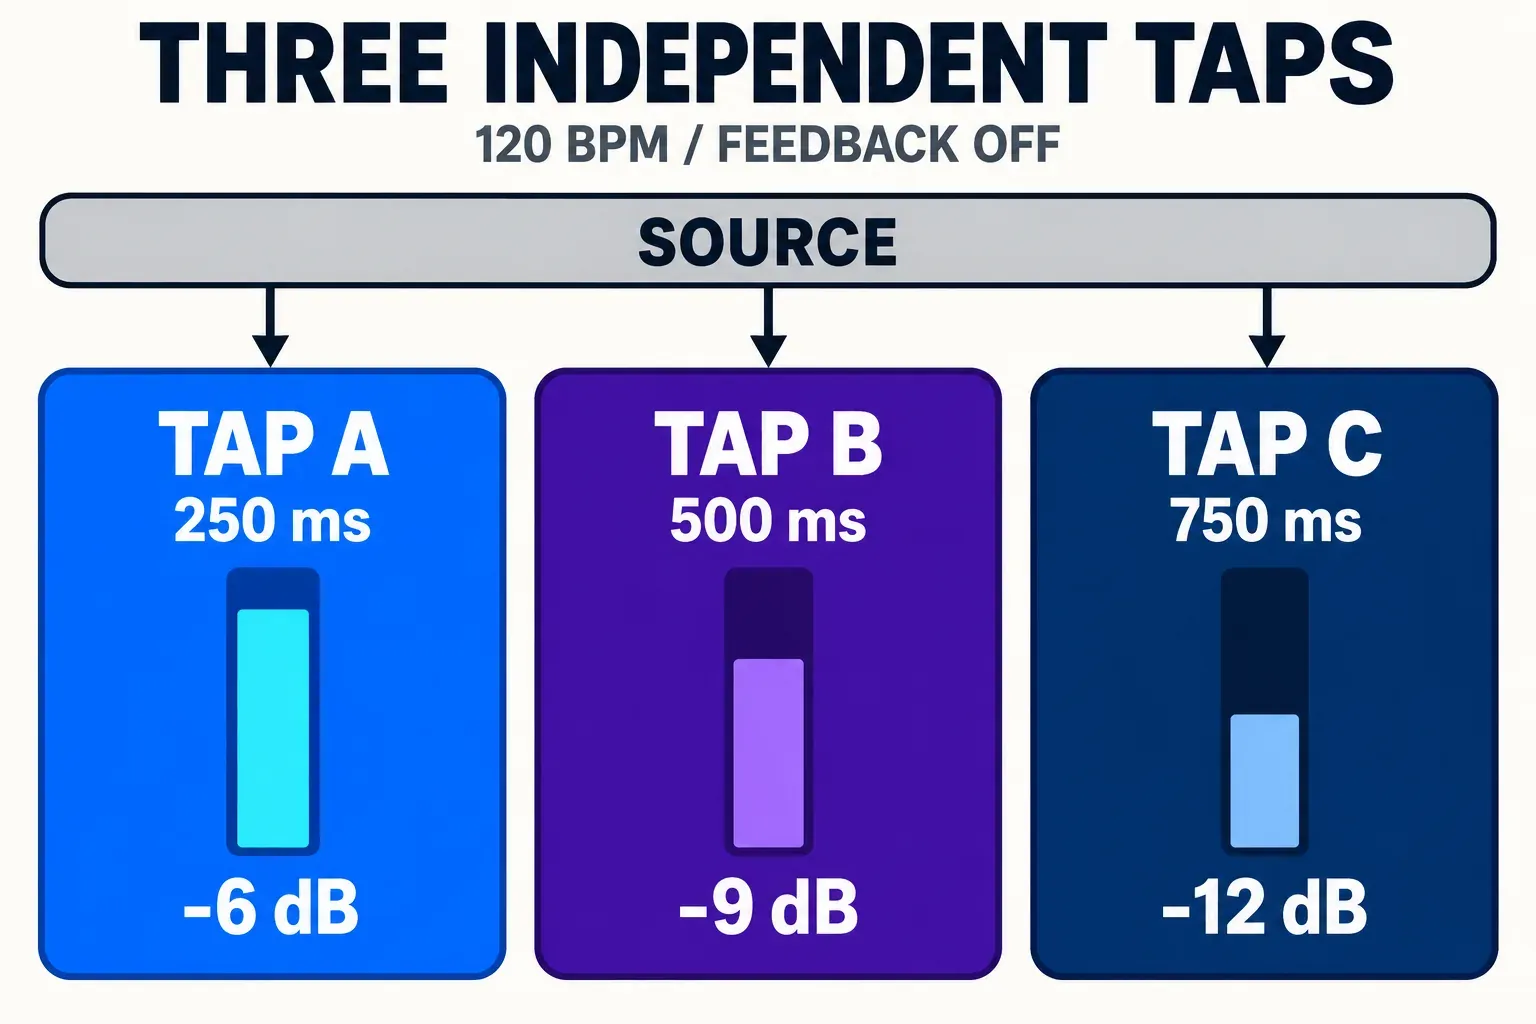
Apple’s sync-mode instructions explain that turning Sync on moves existing taps toward the nearest grid position. New or moved taps then snap to that grid. Choose the resolution before doing detailed timing work. A saved synchronized setting follows a different project tempo. The example millisecond values above don’t.
Start erases existing taps
The Tap pads offer a different way to enter a rhythm. Clicking Start automatically deletes all existing taps. Save first. Start arms recording, subsequent Tap clicks create taps, and Last Tap creates the final one and ends recording. That final tap is also assigned as the feedback tap. Apple’s tap-creation procedure documents the reset and the automatic stop after 10 seconds or the 26th tap.
To add one repeat to a pattern you already like, click the Identification bar instead. Option-drag an existing tap there to copy it. Letters record creation order. They don’t mark a permanent left-to-right sequence, so moving B ahead of A doesn’t rename either tap.
Recheck Feedback after using the pads. Apple documents that an enabled Feedback circuit switches off during tap recording and on again when recording stops. Switch it off yourself if you want only the finite pattern.
Edit one tap, then shape the pattern
Select a tap by clicking its line or its letter. Use the numeric Tap parameter bar when you need an exact value. The main display is better for comparing several taps visually. If an edit changes several repeats unexpectedly, inspect the selection before continuing. Multiple selected taps change relative to one another.
Level: set the relative strength of each repeat. The Level-view toggle mutes a tap. A long sequence doesn’t have to get quieter, but a falling level pattern is a sensible first choice when the source must stay in front.
Cutoff: turn the selected tap’s filter on, then use HP to remove unwanted lows and LP to soften excessive highs. Make later taps darker only when that helps the phrase. Leave resonance modest initially. The 6 dB or 12 dB slope choice applies to both filters. You can’t set their slopes independently.
Pan: in a mono-to-stereo instance, pan the three repeats left, right and center if that supports the part. A stereo-to-stereo instance adjusts balance and also offers Spread. A mono instance has no Pan. On a mono track, open Delay Designer’s submenu in the plug-in menu and choose the mono-to-stereo format. Choosing the plug-in name alone loads the first format in that list. Apple’s channel-format distinctions matter when an older tutorial’s controls don’t match yours. The numeric Pan convention here is positive for left and negative for right.
Transp: switch Pitch on and set semitones in the left field, cents in the right. I’d start with one deliberately pitched tap rather than transposing every repeat. A pitched response can clash with the next chord even when its rhythm fits, so judge it across the chord change.
The Toggle bar is contextual. In Cutoff it enables the filter, in Reso it changes slope, in Transp it enables pitch, in Pan it changes Flip mode and in Level it mutes. Apple’s Tap display reference explains why those small buttons are not universal on/off switches.
Add one controlled feedback path
Once the finite pattern works, choose a tap in the Master section’s Feedback Tap menu, turn Feedback on and raise its level cautiously from a low setting. One chosen tap returns to the effect input. Its timing and processing therefore affect the pattern that continues through the circuit. There’s no separate feedback amount for every tap.
Choose an untransposed tap for a more stable starting point. Feeding back a pitched tap can create continuing pitch movement. For a clean phrase ending with exactly three repeats, leave Feedback off and keep the three taps. More feedback is the wrong fix for wanting one additional, precisely placed echo.
For a vocal throw, automate the track send to feed the chosen word while letting the existing return tail continue. That decision belongs with the broader stock vocal-mixing workflow, rather than a permanent loud delay across every lyric.
Fix silence, timing shifts and unwanted tails
No repeats: check the source send, aux bus input, plug-in bypass, Wet level and aux output first. Then check each tap’s Mute state and Level. Autozoom makes all taps visible again. Apple documents a 10-second maximum delay. After loading a synchronized setting at a slower tempo, taps beyond that limit stay saved but don’t play.
The rhythm moved: inspect Sync, Grid and Swing. Swing at 50% gives even spacing; it has no effect outside Sync mode. Changing the grid or enabling Sync can move taps. Use a finer grid for a deliberate offbeat detail instead of fighting the snap.
The dry track became louder: check whether the aux is returning an additional dry copy. Mute Dry inside Delay Designer on a parallel return. If lowering the source fader leaves too much effect, inspect the send mode. Pre Fader doesn’t follow that fader.
The tail keeps building: lower or switch off Feedback, then reduce the send or Wet level as needed. Count the taps separately from the feedback cycles. If the rhythm is right but the phrase stays crowded, shorten the pattern or remove repeats before reaching for another plug-in.
Use Save Setting As in the plug-in Settings menu to preserve a useful variation without overwriting the existing setting. Apple’s plug-in setting instructions also confirm that the project recalls its plug-in settings. Keep the version that earns its space in the song. The Mix & Master hub connects this delay decision to routing, tone and final balance.


