How to Use Markers in Logic Pro
Label a song without moving its music. Choose the right marker creation command, edit exact positions and turn a section into an audition loop.

To add a marker in Logic Pro, show the Marker global track, place the playhead where you need the label, then click that track’s plus button. Double-click the new marker to name it. If the label must land between grid points, use Create Without Rounding in the Marker List instead.
I’d use regular markers for section names, edit reminders and reference-song notes. They let you find a passage without moving the music. The choices that matter are which creation command you use and whether what you need is the separate Arrangement track.
Choose the right kind of marker
A regular marker labels a position or range. An arrangement marker can move a complete song section and its connected content. Apple’s arrangement-marker overview describes that structural role. Moving an ordinary marker isn’t a way to copy your chorus.
For “verse starts here” or “check this edit,” stay in the Marker track. For changing section order, use the existing song arrangement workflow, including its content-connection and project-safety checks. Flex markers and transient markers serve audio-timing tasks. They aren’t project labels like these.
Add markers at the right position
- Choose Track > Global Tracks > Show Global Tracks, or press G with the default command set.
- If Marker is missing, Control-click the global-track header area, or press Option-G, and choose Marker. Showing global tracks does not guarantee that every global lane is visible.
- Place the playhead at the intended section boundary.
- Click the plus button in the Marker track. This method rounds the new position to the nearest quarter note.
- Double-click the marker and enter a useful name, such as “Verse 1” or “Check vocal edit.”
The Marker track and Marker List controls give you two views of the same labels. Open the list through the control bar’s List Editors button, then Marker. For a separate window, choose Navigate > Open Marker List.
Do not treat every Create command as the same button. Apple documents these different marker-position rules:
| Method | Where the marker lands | Use it for |
|---|---|---|
| Marker track plus button or Pencil tool | Nearest quarter note | A label aligned to a beat |
| Marker List: Options > Create; or Create Marker key command | The current bar line, or the next bar when the playhead is between bars | Dropping musical section boundaries during playback |
| Marker List: Options > Create Without Rounding | The exact playhead position | An edit, cue or event that falls off the musical grid |
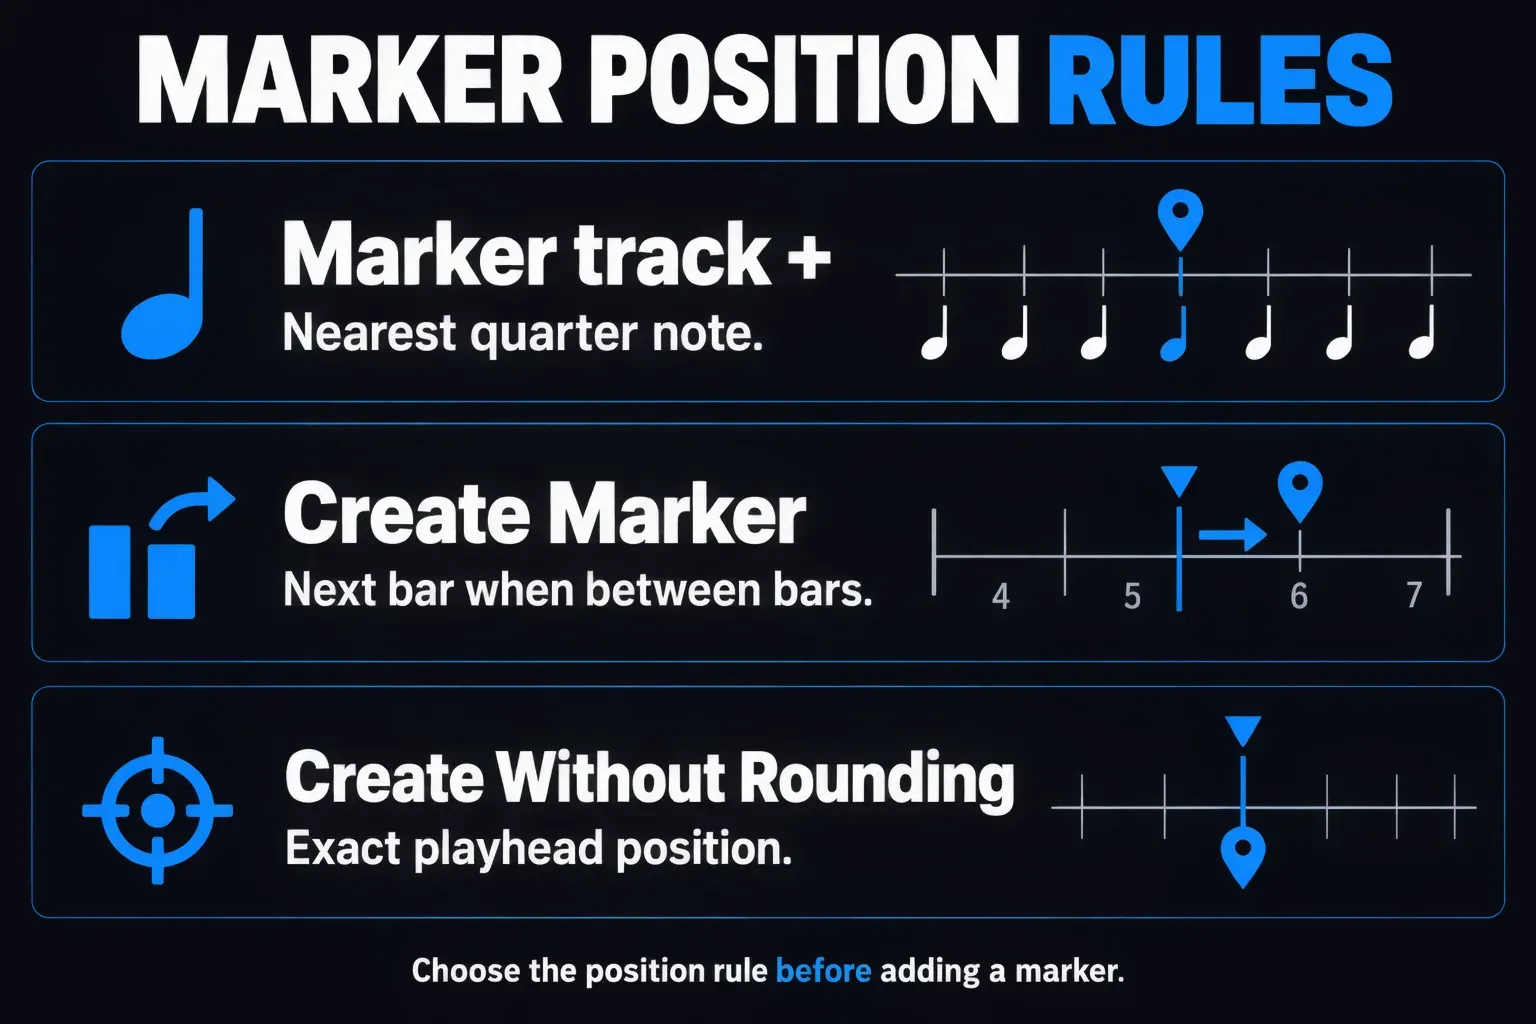
With Create Marker, a playhead between bars 5 and 6 produces a marker at bar 6. It doesn’t choose whichever bar line is closer. That command also refuses to create another marker when one already exists at the bar position or within a quarter note on either side, so check the existing label before assuming the command failed.
A new regular marker normally extends to the next marker, or to the project or folder end when none follows. It isn’t automatically an eight-bar song section. To turn a selected region’s outline into a label, click the word Marker in the global-track header and choose Create Markers From Regions. Logic carries across the region names, positions, lengths and colors.
You can also drag a cycle area into the Marker track to create a marker for that range. Dragging it onto an existing marker adjusts that marker to fit the cycle area, so watch the drop target.
Edit names, positions and lengths
Keep names short enough to read at your working zoom. A clipped label isn’t necessarily lost text: the visible length depends on the available space and the next marker. Double-click a marker in the track to rename it, or double-click its entry in the Marker List’s Marker Name column. For longer instructions, use the Marker Text area. Its first paragraph supplies the name.
Drag the middle of a regular marker to move it. Snap determines the movement increments. For a precise edit, double-click its Position value in the Marker List and enter the position. You can adjust bar, beat, division and tick values individually.
To resize a marker, drag its left or right edge, or edit its Length in the list. Markers can’t overlap. Dragging the junction where two adjacent markers meet resizes both with no gap between them. These are marker editing operations, so the audio region beneath the lane stays as it is.
To copy a marker, Option-drag it. To color one, choose View > Show Colors, select the marker and choose a color. The default palette shortcut is Option-C. I’d use color to tell a section map apart from a problem to fix. If every label gets its own color, they all compete for attention.
Jump to a marker or loop its range
Option-click a regular marker in the Marker track to move the playhead to its beginning. When that track is hidden, Option-click the marker in the ruler instead. A plain click is a selection action, so adding the modifier matters. The Marker List works differently: click a marker’s name there and the playhead moves to that marker, so the list doubles as a clickable index of the song.
For repeated auditioning, select the marker and use Set Locators by Marker and Enable Cycle, assigned to Control-Option-C by default. Another route is to drag the marker into the upper part of the ruler. Apple’s marker navigation instructions also list Shift-clicking a marker in the ruler when the Marker track is hidden. That location is part of the instruction. It isn’t a universal Shift-click gesture anywhere in the project.
Search for Go to Next Marker, Go to Previous Marker or Go to Marker Number in Key Command Assignments when you want keyboard navigation. Numbered commands follow the markers’ serial order, not a number you type into their names. Use Option-K and the key-command assignment checks if your keyboard layout or imported preset differs.
Keep separate notes and fixed-time cues
A section map and a list of mix fixes can get cluttered fast. In the Marker List, choose New Set from the Marker Set menu, then give the set a useful name with Rename Set. Only the current set appears in the track and list, and newly added markers belong to it. Apple’s marker-set instructions make this a visibility and organization tool. A set doesn’t create another arrangement or copy the music.
For a cue tied to an absolute time, select the marker and choose Options > Lock SMPTE Position in the Marker List. It keeps its time position if you change tempo, which means its bar position can change. Use Unlock SMPTE Position when that protection is no longer needed. Leave ordinary musical section markers unlocked when they should follow the bar grid. Movie scene markers, shown with a clock icon, are SMPTE-locked from the start. Choose a range from Navigate > Other > Create Movie Scene Markers to generate them at a video’s scene cuts, and use Options > Convert to Standard Marker in the Marker List when one should become a regular marker.
When a marker looks wrong
- No Marker lane: show global tracks, then explicitly enable Marker in the header configuration.
- A new label lands ahead of the playhead: check whether you used the next-bar Create Marker command. Choose Create Without Rounding for an exact cue.
- No second marker appears: inspect the existing marker near that bar and the creation method’s duplicate protection.
- Markers disappeared after New Set: select the previous set. Creating another set hides its predecessors; it does not mean their labels were deleted.
- The position will not follow a tempo change: check for a lock symbol and SMPTE position protection before dragging or deleting anything.
To remove an unwanted regular label, select it in the Marker track or Marker List and choose Edit > Delete, or Control-click it and choose Delete Marker. Apple’s marker deletion controls apply to that selection. Check that you selected the label, not a musical region or a connected arrangement section.
Once you can jump to a passage and loop its range, carry out the actual edit in the Tracks area. The Record & Edit hub connects that navigation step to region editing, recording and export.


