How to Edit MIDI Velocity in Logic Pro
A note edit, a region offset and a MIDI effect can produce similar sounds while changing different things. Choose the right one before flattening a performance.

To change MIDI velocity in Logic Pro on Mac, select notes in the Piano Roll and drag the Velocity slider. For a quick edit directly on a note, hold Control-Command and drag vertically. Apple’s Piano Roll velocity controls also let you give selected notes one common value with Option-Shift and the Velocity tool.
That changes the notes themselves. If an entire passage needs a different response, use the region’s Velocity Offset or Dynamics instead. If you want to reshape the notes reaching the instrument while you play, use Velocity Processor. I’d choose between those three jobs before trying to make a performance look more even.
Choose what you want to change
- One wrong accent or a selected group: edit note velocity in the Piano Roll. This changes the stored performance.
- A whole region is too forceful or too uneven: use the Region inspector. Its playback settings let you compare a correction while retaining the underlying note values.
- The instrument needs a different response to live input: use Velocity Processor in MIDI FX. It changes the MIDI reaching the instrument; recording that processed output is a separate decision.
Velocity describes the force of the note attack, not a decibel level. Apple documents a standard Mac editor range of 0 to 127 and notes that velocity can affect tone parameters as well as loudness. A higher value can make a patch brighter or more aggressive, but it isn’t a substitute for the channel fader.
Edit selected notes without flattening the phrase
- Select the MIDI region and open the Piano Roll. If note selection is getting in the way, the Piano Roll editing guide covers selecting and isolating notes.
- Select only the note or group that needs attention. For a piano chord, that might be its melody note rather than every note in the chord. To spot outliers first, choose View > Set Note Color > By Velocity in the Piano Roll menu bar. Harder notes then show warmer colors and softer notes cooler ones.
- Drag the Velocity slider, or hold Control-Command and drag a selected note up or down. Watch the value in the help tag.
- Play the passage again in context. If you want notes to sound during the drag, enable MIDI Out in the Piano Roll menu bar.
If your MIDI data display format is set to 0.0–127.9 or Percent, Apple documents holding Shift while dragging the Velocity slider for finer increments. That’s the slider gesture for those display formats. The Option-Shift Velocity-tool gesture below assigns one common value instead.
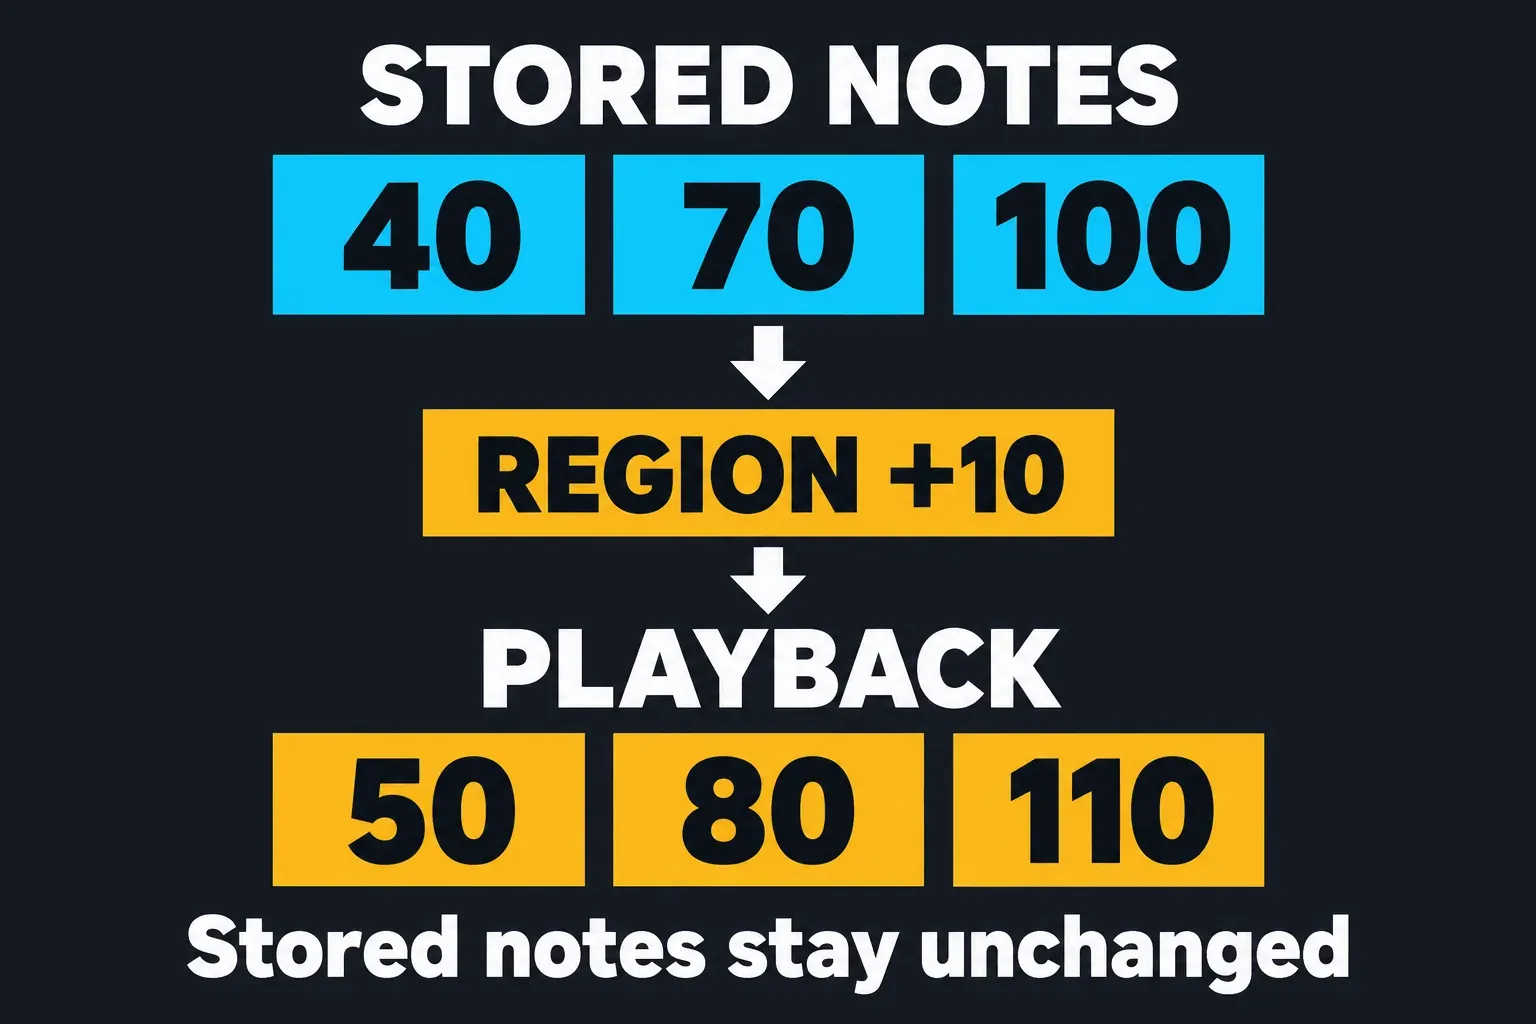
With several notes selected, Logic normally preserves the differences between their velocities. Suppose three notes start at 40, 70 and 100. Raising them by 10 gives 50, 80 and 110. Those are example values. They aren’t a recommended dynamic curve.
The group stops moving when any selected note reaches the bottom or top of the range. That can look like a broken slider. Apple documents an Option-drag override that lets the edit continue, but it changes the relationship between the selected notes. Reduce the selection first if you only meant to fix one outlier.
For a gradual build across several notes, select them in the Piano Roll and choose Functions > MIDI Transform > Crescendo. Set the Position condition so it covers those notes, set the two Velocity values in the Operations area, then click Select and Operate. A smaller value range gives a gentler crescendo. For a diminuendo, put the higher value in the top Velocity field and the lower one in the bottom field.
Make selected notes the same velocity
Select the notes, choose the Velocity tool, then hold Option-Shift while dragging one of them. Release at the value shown in the help tag. This assigns a common velocity instead of preserving the original differences. Do not confuse it with Option alone, which overrides the group’s range limit.
Fixed velocity is useful for a deliberately even trigger pattern. For expressive piano, it can erase the balance between the melody and inner voices. I’d first fix the notes that distract from the phrase, then decide whether the remaining variation needs correction.
On iPad, Logic Pro uses touch controls for the same edit. Tap the Velocity button in the Piano Roll Editor menu bar, select one or more notes and drag a selected note up or down. For a typed value, tap the Trim button, select the notes, tap the Inspector button, open Details in the Note inspector and tap the Velocity field.
Change a region while keeping its original notes
Select the MIDI region in the Tracks area and open the Region inspector. In the current Mac guide, the relevant control is called Velocity Offset. Older Logic versions and tutorials may call it Velocity. A positive offset raises the playback velocities, and a negative offset lowers them. Apple’s MIDI region parameter reference explains that values stop at the MIDI range limits.
For example, +20 can’t turn a note at 120 into 140: playback reaches 127. Several strong notes can therefore end up at the same ceiling. Use a small offset when you want the passage to hit the instrument harder. Skip it when you need to reduce the difference between its strongest and weakest notes.
Expand More in the Region inspector to find Dynamics. Values below 100% reduce the differences between soft and hard notes. Values above 100% expand them. Start with a modest change and compare the phrase. Dynamics is the better first choice when an otherwise useful performance has too wide a velocity range.
Dynamics: Fixed transmits notes at 64 before the region’s Velocity Offset is added. An offset of +16 therefore gives a fixed playback velocity of 80. This is a reversible alternative to assigning every stored note the same value in the editor.
The original Piano Roll values can remain unchanged while those playback settings alter what you hear. Return Velocity Offset to 0 and Dynamics to 100% to remove these two region adjustments. Check the Track inspector too: its own Velocity Offset applies across the track’s regions.
Leave the correction reversible unless you need to commit it. Functions > MIDI Region Parameters > Apply All Parameters Permanently writes region settings into the data and resets the applied playback parameters. It does more than change velocity, and Apple describes channel-handling exceptions. Preserve an untouched copy and review the other region settings before using that command.
Use Velocity Processor for the instrument’s input
Add Velocity Processor to the software instrument track’s MIDI FX section. It processes note-on and note-off velocities in real time. For the strength of the attack, use the note-on Process button. Note-off velocity is a separate message and doesn’t do the same job.
To force processed notes to one value, choose Value/Range in the Mode menu, switch to Value, and set the Value slider. Apple identifies that slider as the fixed velocity for processed notes. Compare with the plug-in bypassed so you know which correction you’re hearing.
To restrain strong notes while retaining variation, choose Compress/Expand. Set a Threshold and a Ratio greater than 1. Apple documents that velocities above the threshold are compressed, while lower velocities pass through unaffected by that compression. Make-up can then add or subtract an overall velocity offset. With Auto enabled, the Make-up control instead sets a maximum velocity reference level.
For example, a threshold near 90 and a ratio near 2 are starting points for a passage whose hardest attacks are the problem. They aren’t universal settings. On its own, this threshold-based approach won’t lift very soft notes below the threshold. Compare region Dynamics if both ends of the performance need bringing together.
Do not use the Track inspector’s Velocity Limit as a compressor. Apple’s track parameter reference says notes outside that velocity range aren’t played. Narrowing it can remove notes rather than make them more even.
Decide whether to record the processed velocities
Hearing a MIDI effect doesn’t by itself mean its output has been written into the region. To capture it, click the arrows near the right edge of the last MIDI plug-in you want included, choose Record MIDI to Track Here, then record into a MIDI region. Apple’s processed MIDI recording instructions explain that effects after this point are excluded.
After recording, inspect the notes and compare playback with the captured processor bypassed. That helps you avoid treating already processed notes a second time. If you want to keep changing the response later, retain the original performance and let the MIDI effect do the work instead. The MIDI recording workflow covers the surrounding recording setup.
When velocity seems not to work
- The selected values will not move: check whether one selected note is already at a range limit. Try a smaller selection before overriding the limit.
- The sound changes but the editor numbers do not: check region Dynamics and Velocity Offset, the track offset, and MIDI FX. Playback processing and a stored note edit are different things.
- The numbers change but the sound does not: check the patch’s velocity response and whether a fixed region or MIDI FX setting is overriding the change. Try a simple velocity-responsive patch on a separate track to isolate the cause, preserving the original sound.
- Quiet notes disappear: inspect Velocity Limit in the Track inspector before assuming the performance was deleted.
Finally, compare the result at the same channel level. If the problem is simply that the whole instrument sits too high in the mix, adjust its level. Keep velocity for the instrument’s response and the phrase’s accents. The Record & Edit hub connects this work with the rest of the MIDI editing workflow.


