Logic Pro Piano Roll: Complete MIDI Editing Workflow
Turn a rough MIDI performance into a clean, musical part without flattening every human detail.

Select a MIDI region and choose View > Show Editors to open the Logic Pro Piano Roll. Drag a note left or right to change when it starts, up or down to change its pitch, and drag an edge to change its length. Select notes to adjust their velocity in the inspector. The sections below cover those edits, controller data, and what to check when the editor behaves unexpectedly.
Keep a copy of the performance before changing a whole passage. Fix wrong pitches and accidental duplicates first, then listen for timing, note-length and velocity problems. A loose piano chord may need no correction; a bass note that clashes with the chord above it does.
The Mac editing commands below were checked against Apple’s current documentation on September 12, 2026. This is a documentation check, not a claim that every step was tested in a live Logic session.
The complete Piano Roll editing workflow
- Duplicate the MIDI region or save a project alternative before broad edits.
- Select the intended MIDI region and open it in the Piano Roll Editor.
- Listen once and identify wrong notes, distracting timing, weak lengths, and uneven dynamics.
- Correct wrong pitches and accidental duplicate notes before changing timing.
- Move only the note starts that interfere with the groove or harmony.
- Resize note lengths to preserve attacks, releases, gaps, and legato by musical intent.
- Edit velocity for phrasing and instrument response rather than visual uniformity.
- Open the Automation/MIDI area and inspect sustain, modulation, pitch bend, or other controller data.
- Listen to the edited part against drums, bass, harmony, and the chosen instrument patch.
- Keep the original region until the edited performance works in the full arrangement.
If the performance hasn’t been captured yet, start with recording MIDI in Logic Pro. That guide covers controllers, Musical Typing, takes, overdubs, and Flashback Capture. This one picks up once a MIDI region exists.
Read the editor before touching the notes
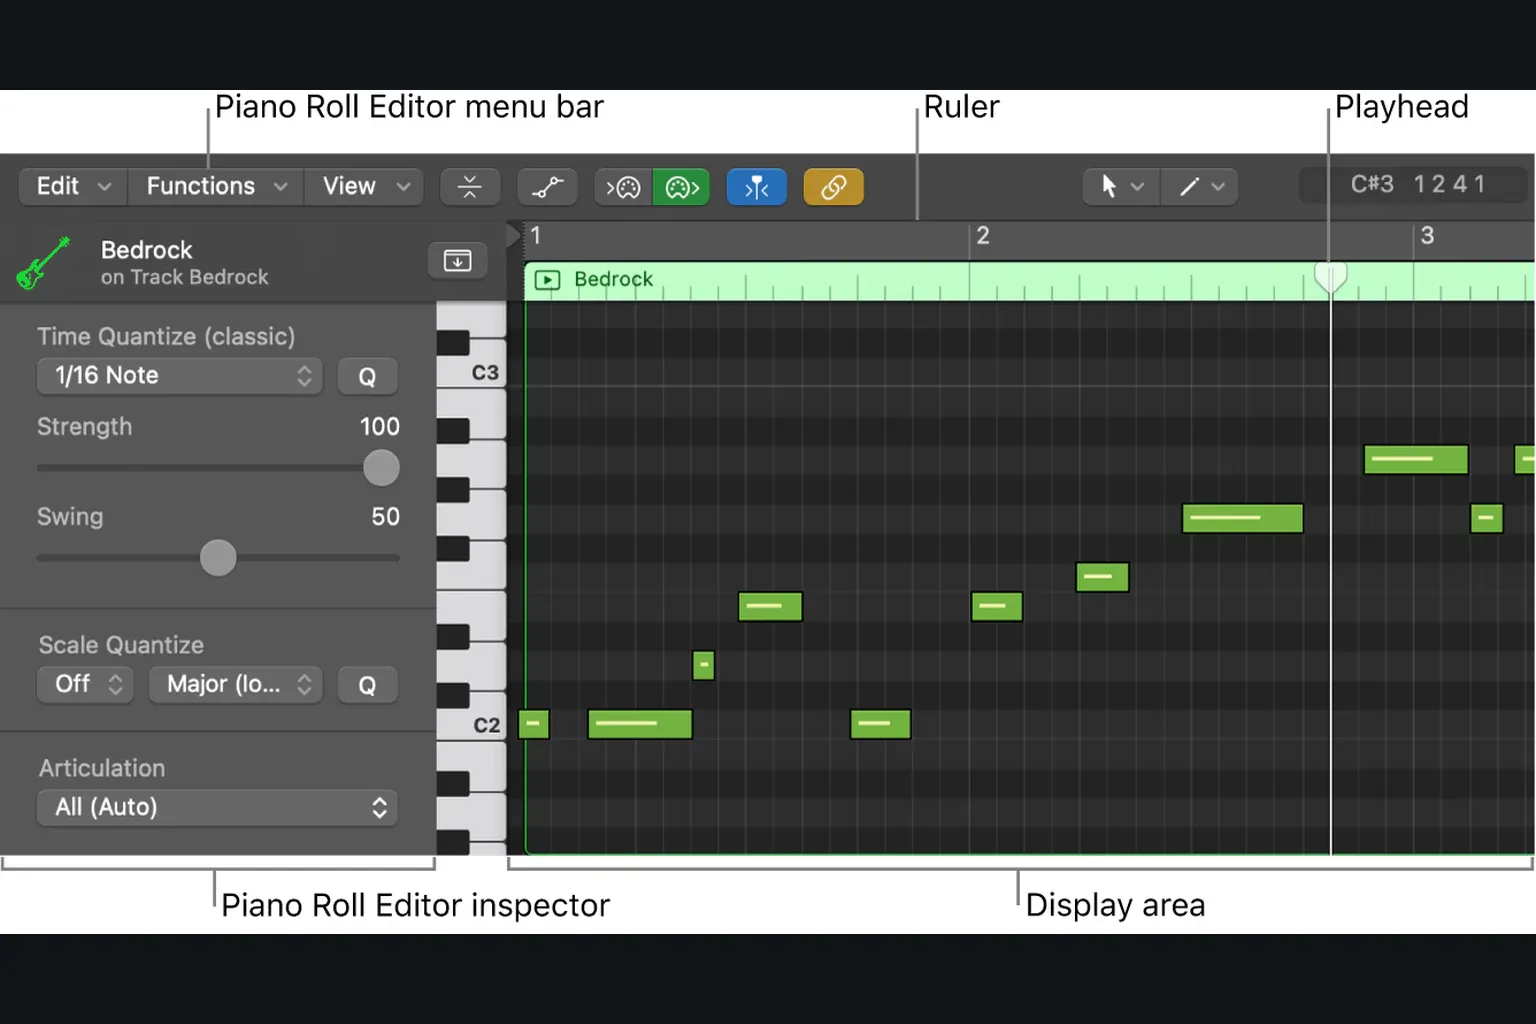
Apple’s current Piano Roll interface reference defines the visual grammar: notes are rectangles on a time grid, pitch rises vertically, time moves horizontally, note length is visible, and colour can represent velocity. The ruler follows whichever time format you chose, and the inspector holds the quantize, pitch, and velocity controls.
For a drum part, choose View > Drum Names in the Piano Roll menu bar when the instrument supplies mapped note names. The keyboard then shows note numbers and names instead of piano keys. Click the Collapse Mode button in the same menu bar to show only lanes used by notes in the selected regions. Apple’s editor overview explains both views.
Select a MIDI region and choose View > Show Editors. Double-clicking a MIDI region also opens Piano Roll when Piano Roll is selected in Logic Pro > Settings > General > Editing > Double-Clicking a MIDI Region Opens. For a separate window, choose Window > Open Piano Roll or press Command-4. Check the header for the region name or number of regions before editing.
Select the correct region and note scope
Click a note to select it, Shift-click to add or remove notes, or drag a selection rectangle around a group. Clicking a key on the vertical keyboard selects notes at that pitch. Check the highlighted notes before a broad edit; Command-A is useful only when all the displayed notes need the operation. Apple’s note-selection instructions also explain the selection count in the header.
Logic can display multiple MIDI regions at once. Apple’s multi-region workflow says Shift-clicking regions in the Tracks area exposes notes from all of them, with coloured vertical lines marking region starts. Double-click a note to isolate its parent region, then double-click the background to come back. It’s how you align bass and kick, or compare voicings, without merging regions.
Preserve a separate copy of the MIDI region before a broad edit, and prevent that copy from playing alongside the working part. A project alternative preserves an arrangement state, but is not a separate backup of its shared assets. The Logic Pro backup workflow covers the project-level safety net.
Add, copy, and delete notes deliberately
Select the Pencil tool and click the grid to create a note; drag as you click to set its length. Apple’s Add Notes instructions explain that a new Pencil note inherits the length, velocity and MIDI channel of the previously created or edited note. Check those values if a new lead note unexpectedly inherits the settings of a quiet drum hit.
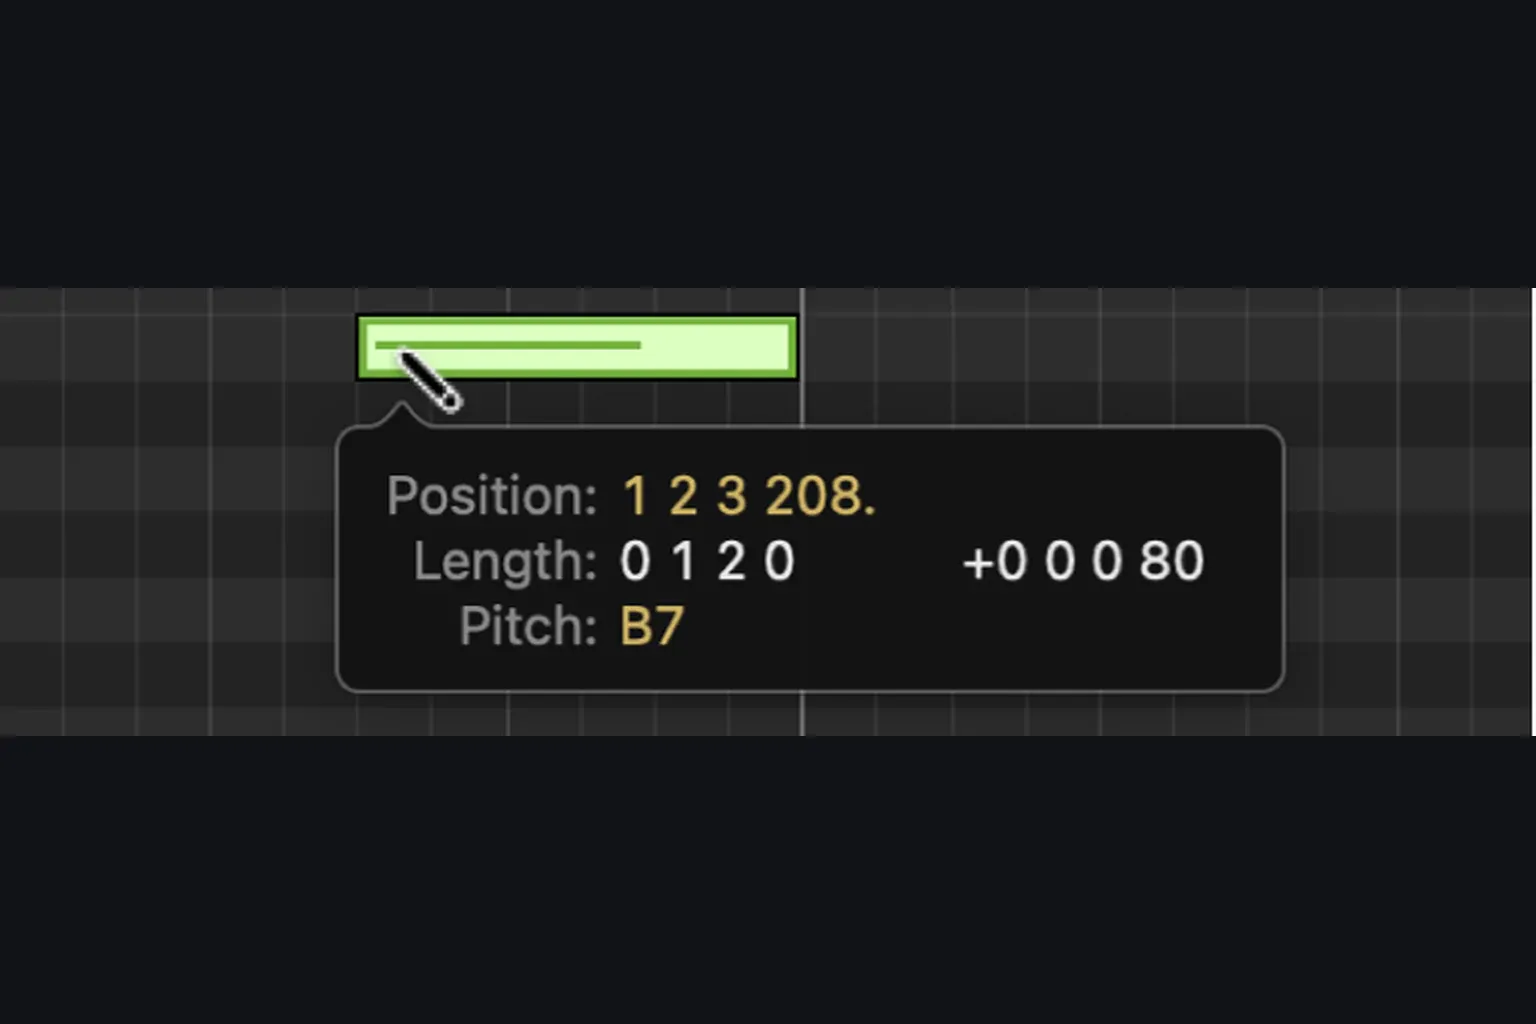
Hold Control-Shift while clicking with the Pencil tool to place a note at the pointer regardless of Snap. The Brush tool paints repeated notes at the current Time Quantize rate. Press and release Shift while dragging to stay on one pitch. To reuse a phrase, select its notes, choose Brush, then Control-click a selected note and choose Define Brush Pattern. Check the Time Quantize value before painting. To perform a hi-hat roll and record subdivision changes as MIDI instead of painting them, use Note Repeat.
To copy notes, select them and Option-drag to a new time or pitch. Delete selected notes with Delete, or click with the Eraser tool. For coincident duplicates, Apple documents Edit > Delete MIDI Events > Duplicates in its note-deletion instructions: it retains one note at a matching pitch and position even when velocities differ. Notes on different MIDI channels are not treated as duplicates. Preserve the original before running it, and listen afterward.
Move notes with the right Snap behavior
Choose a value in the Piano Roll’s Snap menu; this setting is separate from the Tracks area grid. Apple’s Piano Roll snapping instructions distinguish Snap Notes to Absolute Value, which places moved notes on the grid, from Snap Notes to Relative Value, which preserves their offset from it. Use relative snapping to move an offbeat phrase without straightening its timing. Hold Control-Shift during a move for tick-level adjustment.
A larger Snap value is useful for moving a phrase by beats or bars; a smaller value helps with individual notes. Listen to the bass against the kick and the chords against the drums before correcting small offsets. A pickup before the bar is not necessarily a late note from the previous beat.
For systematic timing correction, the Logic Pro quantization guide separates region and note quantize, Strength, Q-Range, swing, mixed subdivisions, and undo. The Piano Roll should stay the place where you judge selected note events, not a shortcut to quantizing every region identically.
Fix pitch and chord voicing before timing polish
Move a note vertically to change pitch. Listen with MIDI Out active so the note sounds while you drag. In chords, select only the wrong voice when the inversion already works. Moving every note because one pitch is wrong changes the voicing, and can hand you a new bass note or a clash.
To change existing pitches, select notes and choose a scale and key in the inspector’s Scale Quantize menus, as described in Apple’s pitch-quantization instructions. To constrain new Pencil or Brush notes, choose the scale and key, then select Snap to Scale. Check chromatic passing notes and key changes yourself: the chosen scale does not describe every note that belongs in a song.
Shape note length as articulation
Drag a note’s left or right edge to change its duration. When resizing several selected notes, hold Shift for a common end point, or Option-Shift for equal lengths; those are different results when notes start at different times. Use the Finger tool to resize a very short note from anywhere on its bar. Apple’s note-length instructions cover these modifiers. The sound still depends on the patch: a one-shot sample may ignore note length, while a sustained instrument may respond to note-off.
For overlaps, select the notes and open Edit > Trim in the Piano Roll. Note End to Remove Overlaps to Selected Notes (8 Ticks Gap) considers the selected notes; the Following Notes version also considers unselected notes that follow. For a small legato overlap, Note End to Selected Notes (4 Ticks Overlap) is a separate command. Listen before applying either across a chord: sustain-pedal data and a patch’s release can keep sound going after the visible note ends.
Edit velocity for phrasing, not uniform colour
Apple documents a 0–127 velocity range in the Mac Piano Roll velocity controls. Velocity often affects loudness, but an instrument can also use it for tone, resonance or sample selection. It is not the same control as the channel fader. Use View > Set Note Color > By Velocity if you want note colours to reflect velocity.
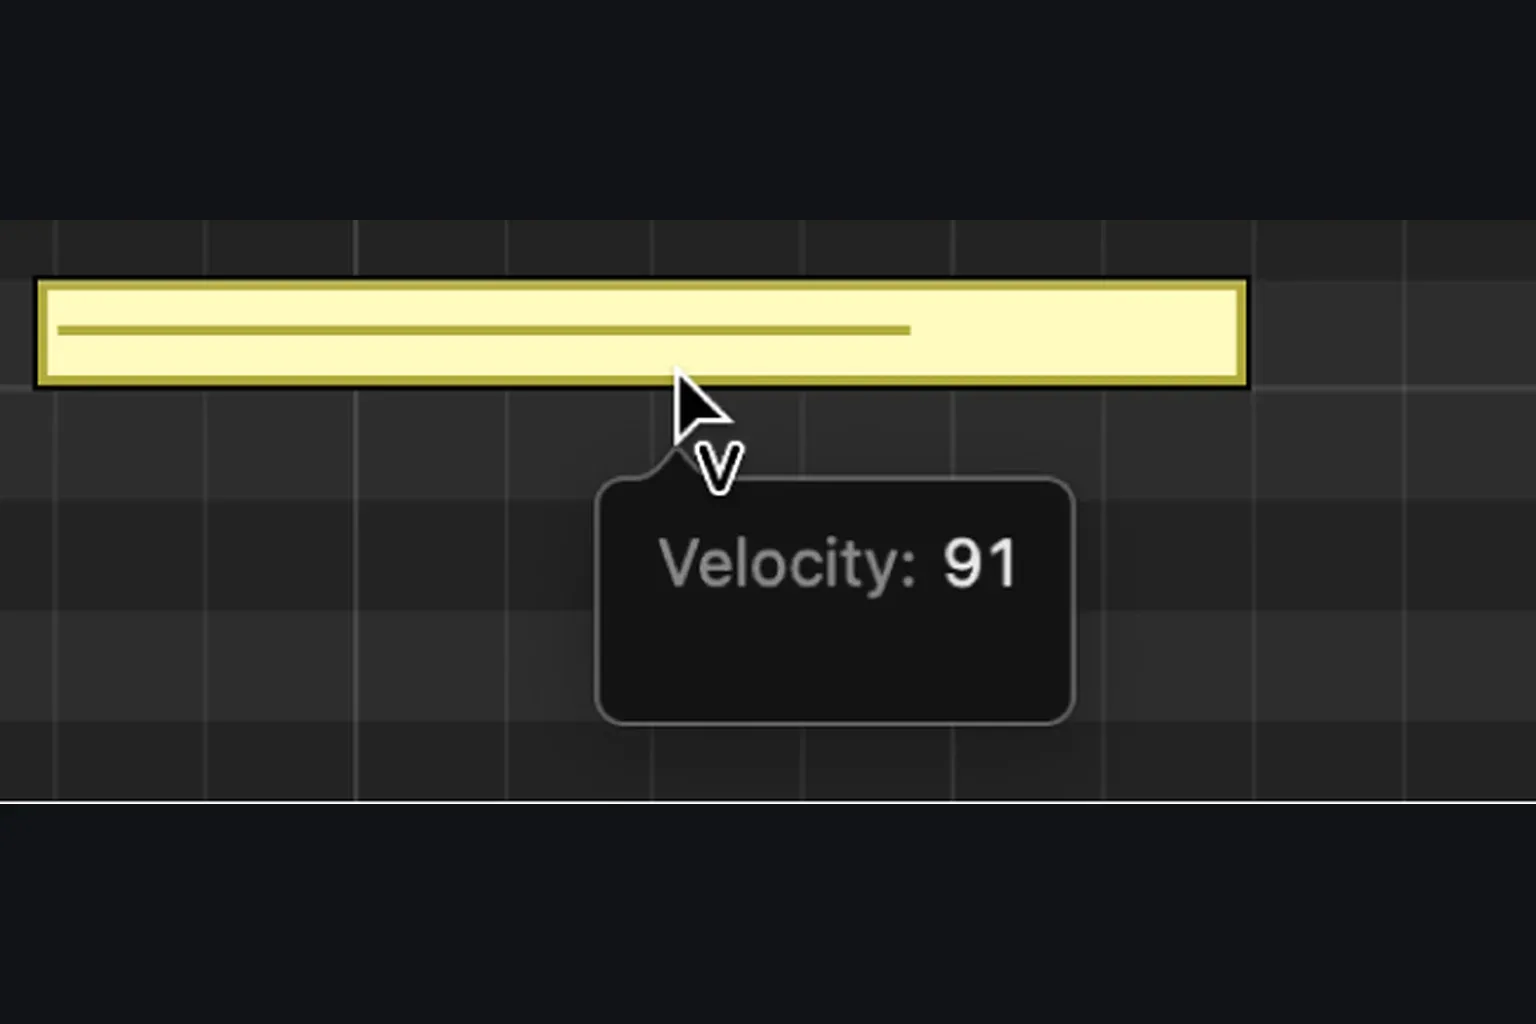
Select notes and use the Velocity slider, or drag vertically with the Velocity tool. Relative differences are preserved until a selected note reaches the minimum or maximum. Holding Option lets you continue beyond that limit and changes those differences; Option-Shift gives all selected notes one common velocity. Turn on MIDI Out to hear notes as you edit them.
Uniform velocity suits an intentionally mechanical trigger pattern. It’s a poor universal cleanup. On drums, shape accents by meter and groove. On piano, protect the melodic top note and the inner-voice balance. On bass or synth, listen for timbral jumps between velocity layers before you chase a smooth graph.
Edit controller data in the Automation/MIDI area
Click Show/Hide Automation in the Piano Roll menu bar. Use the Automation button to choose Track or Region, then select the parameter you want to edit. Apple’s Automation/MIDI area instructions explain that Track displays the same automation curve as the Tracks area; Region can display region automation and MIDI controller data.
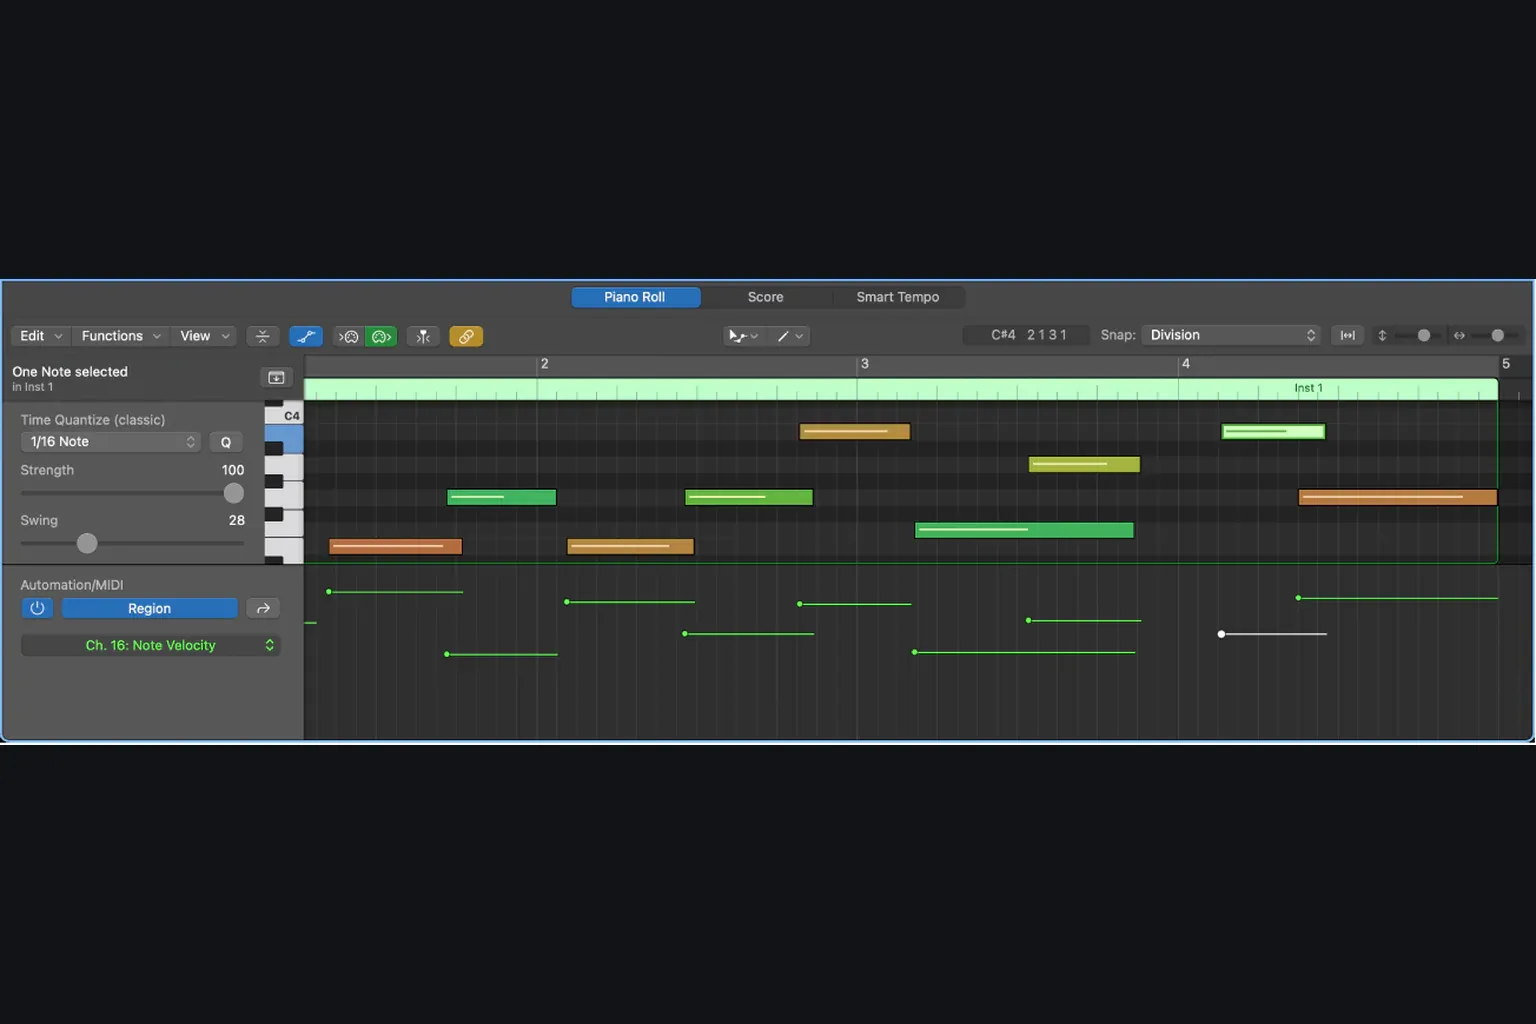
Check sustain (CC64) if piano notes keep ringing, and inspect modulation, pitch bend or expression when the performance changes unexpectedly. Before moving notes with their controller events, choose Functions > Include Non-Note MIDI Events. Apple’s note-moving instructions describe this option for events such as pitch bend, modulation and aftertouch. Listen across the edited boundary afterward; moving a note alone is not proof that its controller data followed.
Use Track when you intend to edit the track’s automation curve. Use Region to work on data carried by the MIDI region. Confirm both the mode and the selected parameter before drawing: a correct-looking curve on the wrong parameter will not fix the sound.
Use a small tool set well
| Tool | Best use | Common mistake |
|---|---|---|
| Pointer tool | Select, move, and resize ordinary notes | Dragging a note when the intent was a selection box. |
| Pencil tool | Add individual notes with controlled start and length | Inheriting an unsuitable velocity or channel. |
| Brush tool | Paint repeated notes or a saved pattern | Using the wrong Time Quantize rate. |
| Velocity tool | Shape note response directly | Flattening useful dynamic differences. |
| Finger tool | Resize very short notes from anywhere on the event | Changing duration when the real issue is sustain data. |
| Mute tool | Compare a note or phrase without deleting it | Forgetting a muted note inside a later copy. |
Piano Roll troubleshooting
| Symptom | Check |
|---|---|
| Wrong notes appear | Select the intended region and check the Link button in the Piano Roll menu bar. Content Link follows the selected region; click again to turn it off. |
| Notes jump to unexpected positions | Snap mode, grid value, relative/absolute behavior, and movement modifiers. |
| New notes have the wrong length or velocity | The last created or edited note, which supplies the Pencil default. |
| Brush creates too many notes | Time Quantize value before drawing. |
| Notes remain audible after their ends | CC64 sustain, instrument release, overlapping notes, and stuck controller events. |
| Velocity changes tone dramatically | The patch’s velocity mapping and sample layers rather than channel volume alone. |
| Clicked or dragged notes are silent | Turn on MIDI Out in the Piano Roll. If note audition is still silent, check the focused instrument and its audio output. |
| MIDI keyboard will not audition notes | The selected instrument track, controller input and audio output. Piano Roll MIDI In is for step input, not a general keyboard-monitoring switch. Follow the MIDI input diagnostic. |
| Editing one region changes another view | Multiple-region selection and which parent region owns the notes. |
Final Piano Roll checklist
- The intended region or regions are visible and identified.
- An untouched version of the performance remains recoverable.
- Wrong pitches and duplicate notes are fixed before global timing edits.
- Note starts support the groove rather than merely matching the nearest line.
- Note lengths suit the instrument’s articulation and release.
- Velocity shapes the phrase without accidental timbral jumps.
- Sustain, modulation, pitch bend, expression, and other controller data are checked.
- The edited part is auditioned with the actual patch and arrangement.
- No muted, hidden, or overlapping note remains by accident.
- The edited part works in the full arrangement, with an original copy still available for comparison.
When the MIDI part is ready, return to Create Music in Logic Pro to choose the next job: tempo, arrangement, drums, sampling, or sound design. If this is your first full project, the Logic Pro beginner workflow carries the song through recording, editing, mixing, and export.
Frequently asked questions
How do I open the Piano Roll in Logic Pro?
Select a MIDI region and choose View > Show Editors. Double-click also works when Piano Roll is selected in Logic Pro > Settings > General > Editing > Double-Clicking a MIDI Region Opens. For a separate window, choose Window > Open Piano Roll or press Command-4.
How do I show drum names in the Logic Pro Piano Roll?
Choose View > Drum Names in the Piano Roll menu bar. The instrument must supply mapped note names for Logic to display them. Click the Collapse Mode button to show only lanes used by notes in the selected regions.
Why does the Piano Roll show the wrong notes or region?
Check the selected MIDI regions in the Tracks area. Click the Piano Roll Link button to use Content Link, which follows that selection; click again to turn it off. With multiple regions visible, double-click a note to isolate its parent region and double-click the background to return.
How do I add a note at an exact position?
Select the Pencil tool and Control-Shift-click the required point. Apple states that this places the note at the exact click position regardless of the current Snap value.
How do I copy MIDI notes in the Piano Roll?
Select the notes, hold Option, and drag them to the new time or pitch. Check the help tag and listen afterward so an accidental duplicate does not remain underneath the copy.
How do I make several MIDI notes the same velocity?
Select the notes, hold Option-Shift, and drag one with the Velocity tool. This assigns a common velocity instead of preserving the existing differences between selected notes.
Why do MIDI notes still overlap after I shorten the region?
A region boundary controls what part of the region plays in the arrangement; it does not necessarily shorten the note events stored inside. Inspect and resize the notes themselves, then check sustain controller data.
What is the difference between track automation and region automation in the Piano Roll?
Track automation belongs to the track timeline and mirrors the curve shown in the Tracks area. Region automation and MIDI controller data belong with the region and can move or repeat with that region.
Should I quantize every note in the Piano Roll?
No. Choose a grid that matches the musical subdivision, select only the notes that need correction, and compare the result with the original feel. Velocity, note length, and controller timing may need attention even when note starts are correct.


