How to Make Bass Sounds in Logic Pro: Three Stock Recipes
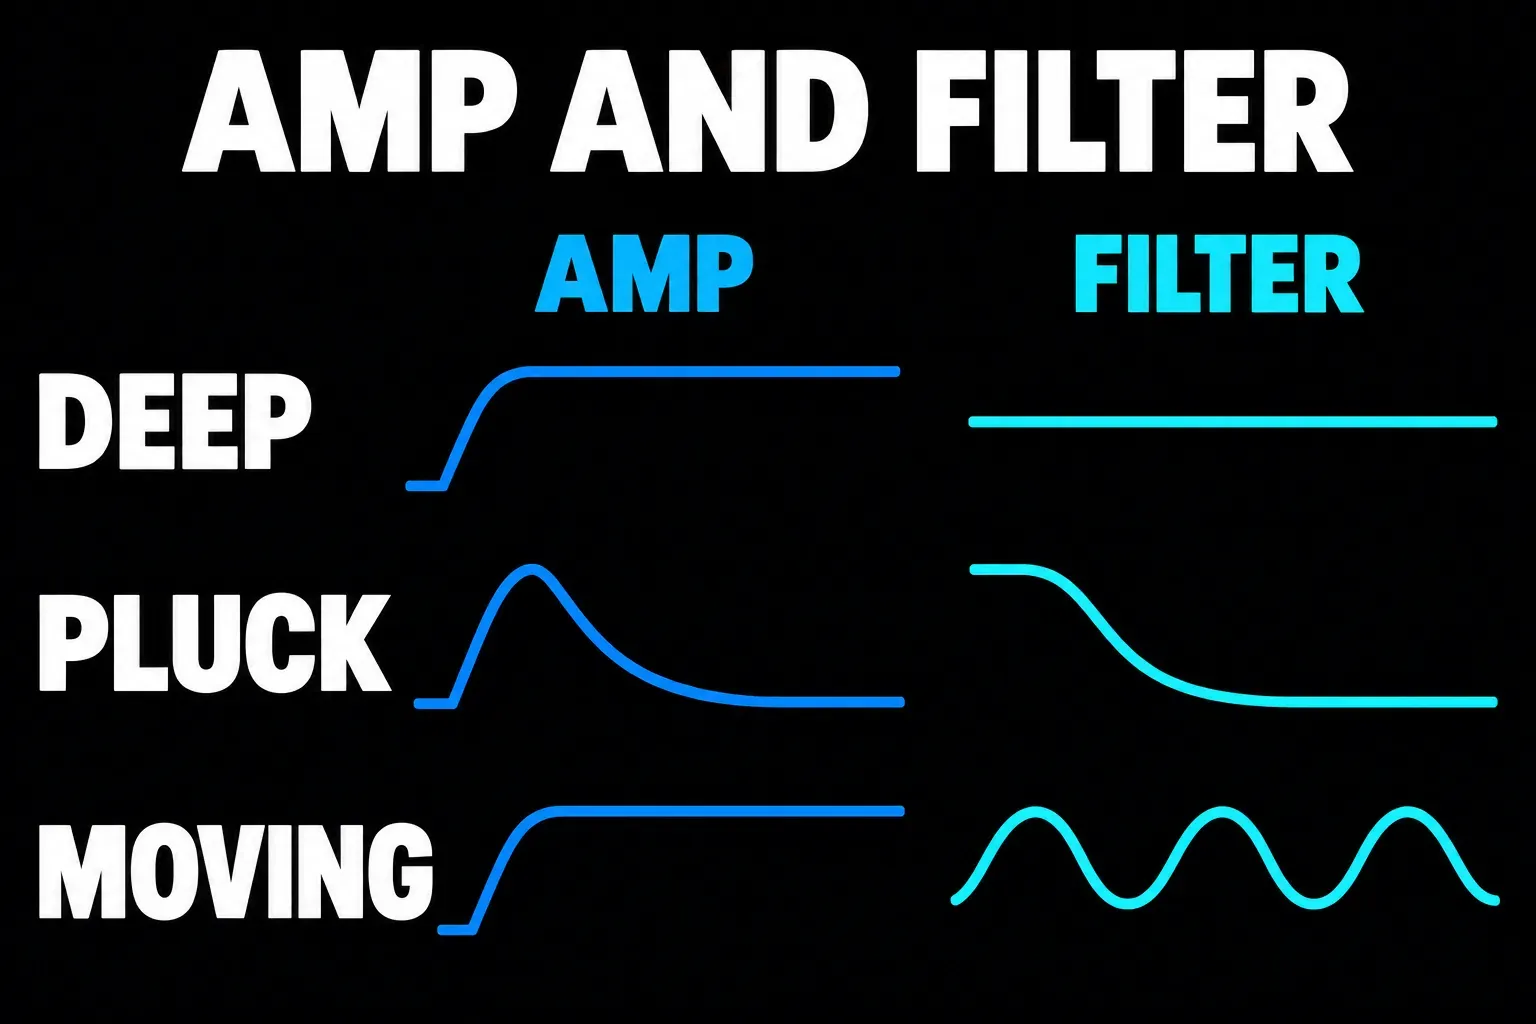
Choose the job before the preset. Build a deep sustained bass, a short pluck or a moving synth line, with separate control over volume and brightness.

To make a bass sound in Logic Pro, load Retro Synth on a software instrument track, choose Analog, then shape the waveform, filter and Amp Env around the part. Start with a deep sustained tone, a short pluck or a moving bass. Each needs a different relationship between note length and brightness.
I’d build the simplest version that does the job, then add movement. A bass can sound impressive by itself and still obscure the kick or lose the rhythm of the line. The recipes below use the same stock instrument so you can compare the changes without learning three interfaces.
Choose the bass job first
| You need | Start with | Listen for |
|---|---|---|
| A rounded foundation under another instrument | Deep sustained bass | Stable pitch and a deliberate end to each note |
| A short, rhythmic bass part | Pluck bass | A clear beginning followed by space |
| A bass that carries movement through a held note | Moving bass | Tonal motion that supports the phrase |
These are synth sounds. For an electric or upright bass character, choose Studio Bass, which also works with ordinary MIDI and pattern regions. You don’t have to use Bass Player. For a long pitched drum tail, use the separate 808 bass workflow. That guide covers sample tuning and slides.
Prepare one plain sound and a useful phrase
- Create a software instrument track and choose Retro Synth from its Instrument slot. Save an existing patch before replacing it.
- In the plug-in window header, open Settings and choose Reset Setting. Select Analog inside the instrument. Turn its internal effect section off while choosing the basic tone.
- Center Shape Modulation, set Vibrato to zero and move Mix fully toward Osc 1. Start with the filter’s LFO and Env amounts centered and Sine Level down.
- Click the instrument’s own Settings label. Choose Mono in Polyphony, the smallest Unison setting, and Stereo Spread at zero. These voice and controller settings are separate from the preset menu in the window header.
- Lower Amp Volume before playing, then bring it to a useful listening level. Keep the first notes separated so each attack is easy to judge.
For a simple audition, try 100 BPM in 4/4. Hold C, MIDI note 36, for two beats. Leave a beat of silence, then play G, MIDI note 43, for half a beat. Repeat that bar, then try four short C notes. This is an editable musical example: the held note exposes sustain and movement, while the short notes expose attack and release. Match the notes to your song once you choose the sound.
You can enter notes in Piano Roll or play them with Window > Show Musical Typing, also available with Command-K. Keep the phrase unchanged while comparing sounds.
Make a deep sustained bass
Use this when the bass should give the track a rounded foundation without a busy top end. Start with one oscillator and get its register right before adding another layer.
- Choose the triangular waveform with Shape 1. Keep Mix toward Osc 1 so oscillator 2 does not complicate the first tone. The Analog waveform controls determine the starting color.
- Enable the filter and choose an LP lowpass type. Lower Cutoff until the upper edge softens, then open it enough that every intended note remains clear. Keep Resonance restrained and the LFO and Env amounts centered.
- In Amp Env, use a quick attack, a high sustain level and a short release. Raise Attack slightly if the onset clicks; shorten Release if the note fills the intended gap.
- Bring up Sine Level only if the sound needs more weight. Lower the overall Volume again as necessary, so the louder version does not win automatically.
Sine Level adds a sine wave at oscillator 1’s frequency after the filter. It doesn’t automatically add an octave below. If you close Cutoff and still hear a round low tone, lower Sine Level to hear what the filtered oscillators are doing.
Play the lowest and highest notes your line needs. If the lowest one only adds rumble, try the phrase an octave higher and compare in the full arrangement. A useful bass register is the one that lets you follow the part. The lowest note the instrument can produce doesn’t make that choice for you.
Make a short pluck bass
Return to the plain setup, then choose a sawtooth with Shape 1. Keep Sine Level down initially. You want the start of each note to speak clearly and then leave room for the next event.
- Set Amp Env to a quick attack, a short decay and low sustain. Use enough release to avoid an abrupt stop, but keep it shorter than the gaps in the phrase.
- Choose an LP filter and lower its resting Cutoff until the held sound becomes dark. Keep the filter LFO amount centered.
- Give Filter Env a quick attack, a short decay and low sustain. Move the filter’s Env knob away from center in the direction that opens the filter at the beginning of the note.
- Play the repeated short notes. Adjust Amp Env when the sound lasts too long; adjust Filter Env or its amount when the bright edge lasts too long.
The two envelopes share ADSR controls, but they solve different problems. Sustain is a held level, not a duration. A closed filter can make a note darker while Amp Env still keeps it sounding. To create an actual gap, check the MIDI note end and the amp release.
Keep Polyphony on Mono and leave a small separation between notes while setting the pluck. Overlapping Legato notes can continue an envelope instead of giving every note a fresh attack. Once the plain rhythm works, introduce connected notes deliberately. If harder playing changes the patch more than you want, reduce the relevant envelope’s Vel slider and inspect the separate Velocity assignment in Settings.
Make a moving bass
Start from the sustained recipe, replace Shape 1 with a sawtooth and keep Sine Level down while setting the motion. Use a held note first. There are two kinds of movement to try. Oscillator detuning changes how the oscillators relate to each other, and filter modulation changes brightness over time.
- Choose a sawtooth for Shape 2, leave Semitones at zero and bring it into the Mix. Move Cents slightly away from zero, then compare with it centered. Semitones and Cents tune oscillator 2, not both oscillators together.
- Keep Amp Env sustaining while the MIDI note is held. Choose an LP filter, set a useful resting Cutoff and leave its Env amount centered for this first version.
- Open the LFO pane, choose a smooth waveform and turn Sync on. Set a slow musical Rate, then move the filter’s LFO knob away from center until the opening and closing is audible.
- Check the LFO Source menu. Choose Mod Wheel if that is your controller, then raise the wheel to hear its contribution. With Musical Typing, keys 4 through 8 change modulation and 3 turns it off. Keep this controller state consistent when comparing the sound.
Apple’s LFO controls separate tempo synchronization, rate and controller source. The filter LFO amount supplies the depth at the destination. Changing Rate alone won’t give you an audible filter sweep.
If the pitch wobbles when you wanted a changing tone, inspect Vibrato and Shape Modulation. If the movement swallows the note, reduce depth or raise the resting Cutoff. Add Sine Level afterward only if a steadier low foundation helps. Because that sine bypasses the filter, it can remain underneath the moving tone.
For a bass that slides between pitches, turn on the Glide/Autobend section, set Bend Type to Glide, choose what moves in the Mode menu, such as All Oscillators, and raise Time until the slide sounds intentional. Then click the Settings label and change Polyphony from Mono to Legato. In Legato, the glide happens only when you strike a new key while the previous one is still held, so overlapping notes in the region slide and separated notes don’t.
Fit the patch to the line, then save it
Bring the kick and main harmony back in. Shorten notes or release when the low end runs across a rhythmic gap. If higher notes become too dull, raise the filter’s Key follow amount gradually and compare the whole phrase. Keep output levels similar when choosing between patch variations, then check the bass quietly and on a smaller playback system.
I’d keep oscillator detune, extra unison voices and stereo effects out until the basic line works. Mono Polyphony prevents simultaneous notes. It doesn’t describe every aspect of stereo output. If widening makes the bass less dependable in the mix, return to the centered, simpler version.
Use the header Settings menu’s Save Setting As command to keep separate versions such as Deep Foundation, Short Pluck and Slow Motion. The normal Save Setting command overwrites the existing setting. For controls beyond these recipes, use the Retro Synth guide. For deeper source layering, use Alchemy. The Create Music hub connects the finished sound to the next writing or production task.


