Logic Pro Crackling Audio: Find and Fix Clicks and Pops
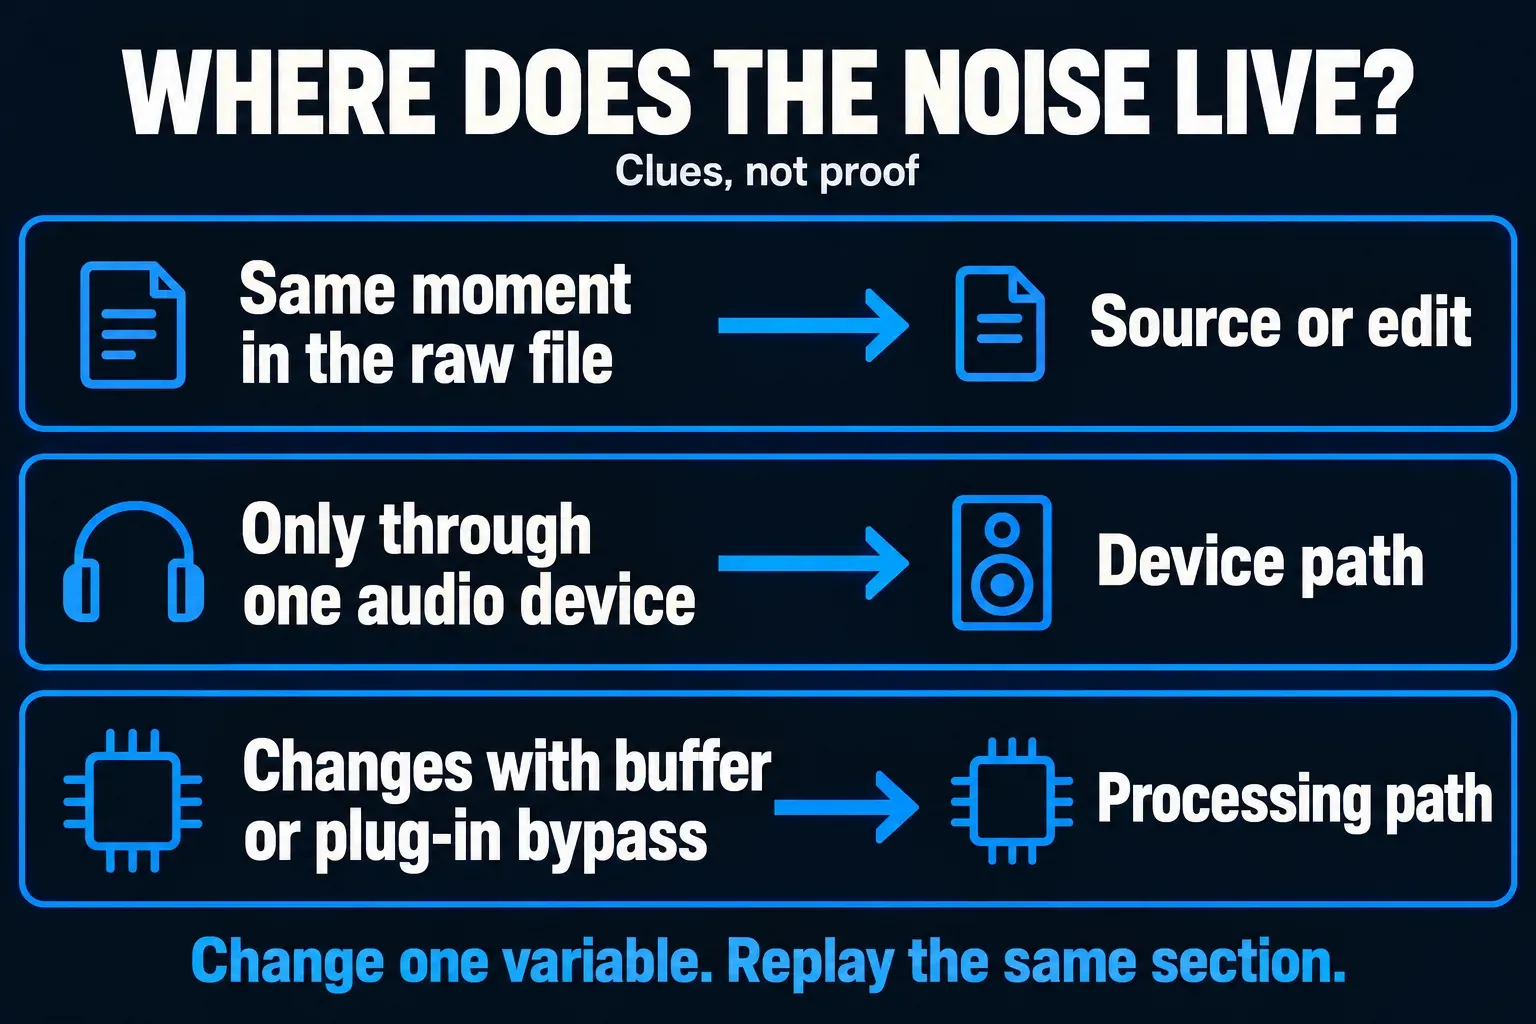
Find out whether the noise belongs to the recording, the project or the output path. Then change the setting or edit that can actually affect it.

To fix crackling audio in Logic Pro, first find out where the noise enters the signal. For intermittent crackles during playback, try raising I/O Buffer Size one step. For a click that stays at the same point in the original recording, inspect the source or edit. If the problem follows one audio interface, compare the device path before changing the project.
I’d start with a saved project copy and one short passage that reliably exposes the noise. Change one thing, replay that passage, and note what changed. A long list of simultaneous adjustments can leave you with a quieter session and no idea why.
Locate the noise before changing settings
Turn the listening level down before investigating loud pops. Then establish whether the noise affects one recorded region, one processed track or everything reaching the output. Listen to the original recording in a separate audio player as well as Logic. Keep the listening device the same for that comparison.
| What you observe | Next useful comparison |
|---|---|
| The same click occurs at the same point in the original file | Inspect the recording and region boundaries before adjusting real-time performance settings. |
| Crackles move between passes or change when the session gets busier | Try the next I/O buffer setting, then inspect processing load. |
| One processed track crackles while its original recording sounds clean | Bypass that track’s processors individually, including its output and return paths. |
| The same passage is clean through built-in audio but noisy through the interface | Investigate the external device, its software, connections and clocking. |
These are clues. None of them is a diagnosis on its own. A plug-in can produce a repeatable glitch, and a damaged recording can sit inside a project that also has a buffer problem. Keep the original file, the processed track and the output device separate in your notes.
Raise the I/O buffer for intermittent crackles
Apple’s Audio Devices reference explicitly connects an undersized I/O buffer with clicks, pops and crackles. That makes a buffer change a sensible first comparison for unstable playback. It doesn’t make every crackle a CPU diagnosis.
- Open Logic Pro > Settings > Audio > Devices.
- Note the current I/O Buffer Size and selected input/output devices.
- Choose the next larger buffer setting and apply the change.
- Replay the same passage. If it improves but still breaks up, try another step.
- If the noise does not change, return to the original setting when appropriate and follow another branch.
A larger buffer trades monitoring responsiveness for processing headroom. Read Resulting Latency below the buffer menu and check the actual headphone feed before recording another performance. The sample-rate and buffer-size guide explains those choices in depth. There’s no magic sample count that guarantees clean audio on every setup.
For recording audio through an interface that supplies direct hardware monitoring, Apple’s overload guidance describes turning off Software Monitoring under Audio > General. Do that only when the performer still has the intended live feed. Hardware monitoring can’t generate a software instrument or reproduce Logic’s live effect chain.
Separate a processing problem from a file problem
When the raw recording is clean, bypass the suspect track’s plug-ins one at a time. Include processing on its aux returns, subgroup and output. A clean track insert chain doesn’t clear the rest of its route. Compare at a safe, similar listening level, because bypassing compression or makeup gain can change loudness sharply.
Use a Custom control-bar display and double-click the CPU or HD meter to open the Performance Meter. Watch Processing Threads and Drive I/O while the problem happens. Apple’s performance troubleshooting instructions distinguish these meters and warn that freezing software instruments can add disk load. Freeze isn’t the first answer when the disk side is already struggling.
Note which track is selected when the crackle appears. Apple’s overload guidance says a selected software instrument track, or the header of a track stack, can put more strain on the CPU during playback. Select an empty track and replay the passage, then select the suspect instrument track and play it again with the Performance Meter open. If the rightmost Processing Threads meter fills only on that second pass, start playback with an empty track selected. While you compare, quit apps you don’t need, but leave your audio interface’s control or mixer software running.
Process Buffer Range also lives in Audio > Devices, not General. The current Audio Devices guide describes it as advance processing for playback tracks that are not in Live mode. Keep that separate from the live I/O buffer. Once the meter points toward a processing or storage limit, continue with the system-overload diagnostic guide rather than changing every threading option here.
If one plug-in repeatedly changes the result, check its supported Logic/macOS versions and contact its developer with the comparison. For missing, incompatible or failing Audio Units, use the Audio Unit troubleshooting workflow. A different project running cleanly is useful evidence, but it doesn’t prove that the current interface or plug-in is always faultless.
Compare a new project and another audio device
Create a new empty project with a simple audio source and the same device settings. Apple includes this comparison in its Logic Pro isolation procedure. If the new project is clean, bring the suspect source or plug-in into that diagnostic project separately. Keep your working project intact and avoid saving a stripped-down diagnostic state over it.
Next, stop playback and lower monitor and headphone levels before changing devices. In Audio > Devices, select the Mac’s built-in output instead of the external interface. For an input comparison, use a built-in microphone or input only if the Mac provides one. Replay or record the relevant simple passage.
A clean result through built-in audio narrows attention to the external path, which includes more than the interface box. Check the exact driver or control-software compatibility, cable and port, then reconnect devices one at a time. Follow the manufacturer’s update instructions. Do not install a different driver simply because a forum reply names it.
For live monitoring, use wired headphones for this comparison. Apple’s monitoring-latency guidance treats Bluetooth as a listening or mixing route because it adds delay. A headphone-path change can alter what you hear without repairing anything in the saved recording.
Check sample-rate and clock conditions
If you also see Error while trying to synchronize Audio and MIDI, inspect the interface’s sample rate and the project’s rate under File > Project Settings > Audio. Apple’s audio/MIDI sync guidance identifies mismatched or fluctuating incoming rates as a cause of that alert. Connected digital devices also need one primary clock source. Check the interface documentation for its clock input and status.
Do not change an established song to a different sample rate as a generic crackle fix. Apple’s project sample-rate instructions warn against changing the rate after audio has been recorded or added. Preserve a separate project copy before investigating a genuine mismatch.
For an Aggregate Device, matching numbers alone don’t settle synchronization. The current Audio MIDI Setup synchronization guide uses Sync Source and Sync controls and explains drift correction/resampling, including devices with fixed or different rates. Follow the controls for your installed macOS and hardware synchronization arrangement. Identical sample rates can still drift. Enabling every box without understanding that arrangement isn’t a diagnosis.
Repair clicks at region edges without altering the source
If a click lands on a cut, region start or repeated boundary, zoom in and inspect that join. Try a short region fade that removes the abrupt edge while keeping the note attack or decay intact. Listen across the boundary in the full passage, not just with the playhead parked on it.
- Select Fade from the Tracks area Tool menu.
- Drag over the beginning or end of the affected audio region.
- Adjust the fade length while checking that the useful sound survives.
- For adjoining edited sections, inspect the transition on both sides and choose the appropriate crossfade.
Apple’s region-fade instructions also provide Fade In and Fade Out parameters in the Region inspector. Work with region fades here rather than a destructive operation on the original audio file.
When trimming or splitting in the Audio Track Editor, Snap Edits to Zero Crossings in the Snap menu can help avoid a click at the edit position. Apple documents that specific purpose in its zero-crossing reference. That snap option can’t fix intermittent device dropouts, and it’s no reason to cut off a consonant or drum attack.
If the original recording already contains distortion, get a clean new take when you can. Check the source and interface input level before recording again, and don’t judge the recording path only by the final output meter. Logic’s channel-strip level reference explains the monitoring meter and clipping indicator. Raising the buffer doesn’t rewrite noise already stored in a file.
Keep the result that identifies the next action
Before asking a device or plug-in vendor for help, record the Logic and macOS versions, exact interface and driver, project sample rate, I/O buffer, failing passage and the comparison that changed the result. Include whether the raw recording clicks in another player and whether built-in audio is clean.
That’s enough to make the next conversation useful. Keep the cleanest stable configuration for the job, then use the Logic Pro troubleshooting map if the remaining symptom is silence, latency, a plug-in failure or an overload alert. Each of those needs its own branch.


