How to Use Drum Synth in Logic Pro
Build individual electronic drum sounds with the controls your selected type actually provides. Fix pitch, tail length and playback mode before assembling the kit.

To use Drum Synth in Logic Pro for Mac, load it in a software instrument track’s Instrument slot, choose a drum family and sound type, then shape that voice with the controls on the right. Click the instrument icon to audition it. One instance makes one drum sound. For a complete kit, use several instances on separate tracks or inside Drum Machine Designer.
I’d start with the sound’s length and pitch, then adjust its attack and character. That order keeps a louder, brighter hit from distracting you from a tail that clashes with the next note. The important choices are which controls your sound type provides, whether notes change its pitch, and what makes each voice stop.
Load one drum voice and choose its type
- Create or select a software instrument track. Click its Instrument slot and choose Drum Synth. Use the instrument slot, not an Audio FX slot; Apple’s plug-in loading instructions distinguish these slots.
- Use the upper menu on the left to choose Kicks, Snares and Claps, Percussion, or Hats and Cymbals.
- Use the sound-type menu below it to choose a starting voice. The controls on the right change with that type, including when you move between two kicks.
- Click the instrument icon to hear the sound as you adjust it. Then play or program repeated notes on the track to judge the tail between hits.
- Check Key Tracking and Mode before deciding that the MIDI notes are wrong. Their behavior is covered below.
Apple describes up to eight selected sound controls per type. The manual’s complete parameter lists cover several types, so don’t expect every listed knob to appear together. Back to Default in the sound-type menu resets parameter changes, so save a version you want to keep before using it.
Drum Synth generates electronic sounds. For a sample-based pad kit, acoustic kit, or a rhythm editor, choose the tool for that job. Drum Machine Designer can contain Drum Synth voices alongside sampled sounds and supplies the kit and pad organization around them.
Shape the voices around the part
Loop a few repeated notes at one velocity while choosing a sound. Keep their timing unchanged as you edit so you can hear what the synthesis controls contribute. Compare at a similar listening level, then put the voice back beside the other instruments. These are sound-design starting points. No single setting suits every song.
Kick: get the tail right before adding weight
For a concrete starting point, choose Kicks > Heavy Kick. Apple’s current panel shows seven sound controls: Pitch, Tone, Saturation, Shape, Sweep, Decay and Volume. That’s the set to work with on this type. Body, Punch and Snap belong to the wider kick family’s options. They aren’t extra knobs hidden on this panel.
Begin with Decay. Shorten the tail until the next kick and the bass remain distinct, or lengthen it deliberately if the kick is also supplying the low note. Next adjust Pitch, which changes tuning in semitone steps. If the sound is functioning as melodic bass, use the more focused 808 tuning and note-length workflow. A long kick alone doesn’t establish the right root note.
Use Shape to change the kick’s shape and Sweep to alter the heft of its attack. Tone changes its overall color. Add Saturation when you want warm distortion, then readjust Volume for comparison. Apple’s kick parameter reference also covers type-specific options: Punch changes attack tone, Snap sets beater noise, and Noise adds a noise signal. Choose a type that provides the control you need.
If the kick sounds impressive alone but crowds the bass, revisit its length and pitch before adding more processing. Keep attack adjustments small while finding that balance. A sharper front edge and a longer low tail solve different problems.
Snare or clap: separate depth from texture
Choose a type in Snares and Claps, then set its Decay against the space between backbeats. Where available, Body changes depth, Noise adds a noise signal, and Tension changes how much the snare snaps. Decide whether the part needs a deeper hit or a noisier one before turning both up.
Apple’s snare and clap controls include Crush for digital distortion and Dirt for grit and fizz. Some types instead offer Cycles to smear the sound, with Speed controlling that effect’s rate. Check the selected type before looking for these controls. Recheck the snare with the hats playing. A texture that sounds exciting in isolation can mask their pulse.
Hats and cymbals: allow only the overlap you want
Choose a hi-hat, shaker, ride or crash type from Hats and Cymbals. Start with Decay, then use the available Tone and character controls. Higher Character values add a metallic edge, and Bell introduces bell-like harmonics. Metallic and Dissonance introduce harmonic and inharmonic content respectively, as defined in Apple’s hat and cymbal reference.
A short closed hat and a ringing ride need different tail behavior. Poly can suit overlapping ringing hits, while Mono makes a new note cut the preceding voice in that instance. Separate Drum Synth tracks don’t become a shared choke group just because both use Mono. For one DMD pad to stop another, use the kit’s pad-group controls described in the DMD guide.
Percussion: change the material before decorating it
The Percussion family covers electronic toms and more synthetic or metallic sounds. On types that offer them, Material moves the sound toward woody, rubbery or bell-like qualities, while Tension changes its rigidity. Apple notes that these controls interact. Where available, Dissonance can strongly affect Material too. The percussion parameter guide explains those dependencies.
Choose the basic material and length first. Then add one character change, such as Dissonance or Crush, and compare. If the percussion already occupies the same bright space as the hats, changing its underlying tone may give it a clearer role than adding another effect.
Use Key Tracking for pitch, not kit selection
With Key Tracking on, you can play the selected sound chromatically. With it off, different keys play the sound at its root pitch. Apple places the Root Key label beside the keyboard in Piano Roll. These are the documented Key Tracking behaviors. Don’t assume that a Pitch value of zero tells you the root of every sound you might load.
Leave tracking off when different incoming notes should trigger the same fixed-pitch drum. Turn it on for a pitched percussion phrase or kick-bass line, and check the notes against the music. Playing another key in a standalone instance doesn’t select a different drum family. For kick, snare and hat on different pads, assemble a kit with separate voices.
Choose what stops the sound: Mono, Poly or Gate
Mode controls voice playback. Decay controls the sound’s own falling tail. A long MIDI note can’t keep an already decayed sound alive. A short MIDI note matters differently in Gate than in Mono.
| Mode | What happens | Choose it when |
|---|---|---|
| Mono | One voice plays. A new note cuts off the previous voice. | Each new kick or percussion hit should replace the old tail. |
| Poly | Multiple voices can play simultaneously. | Successive ringing hits should be allowed to overlap. |
| Gate | Mono behavior, with sound heard only while the key is held. | MIDI note ends should also stop the sound. |
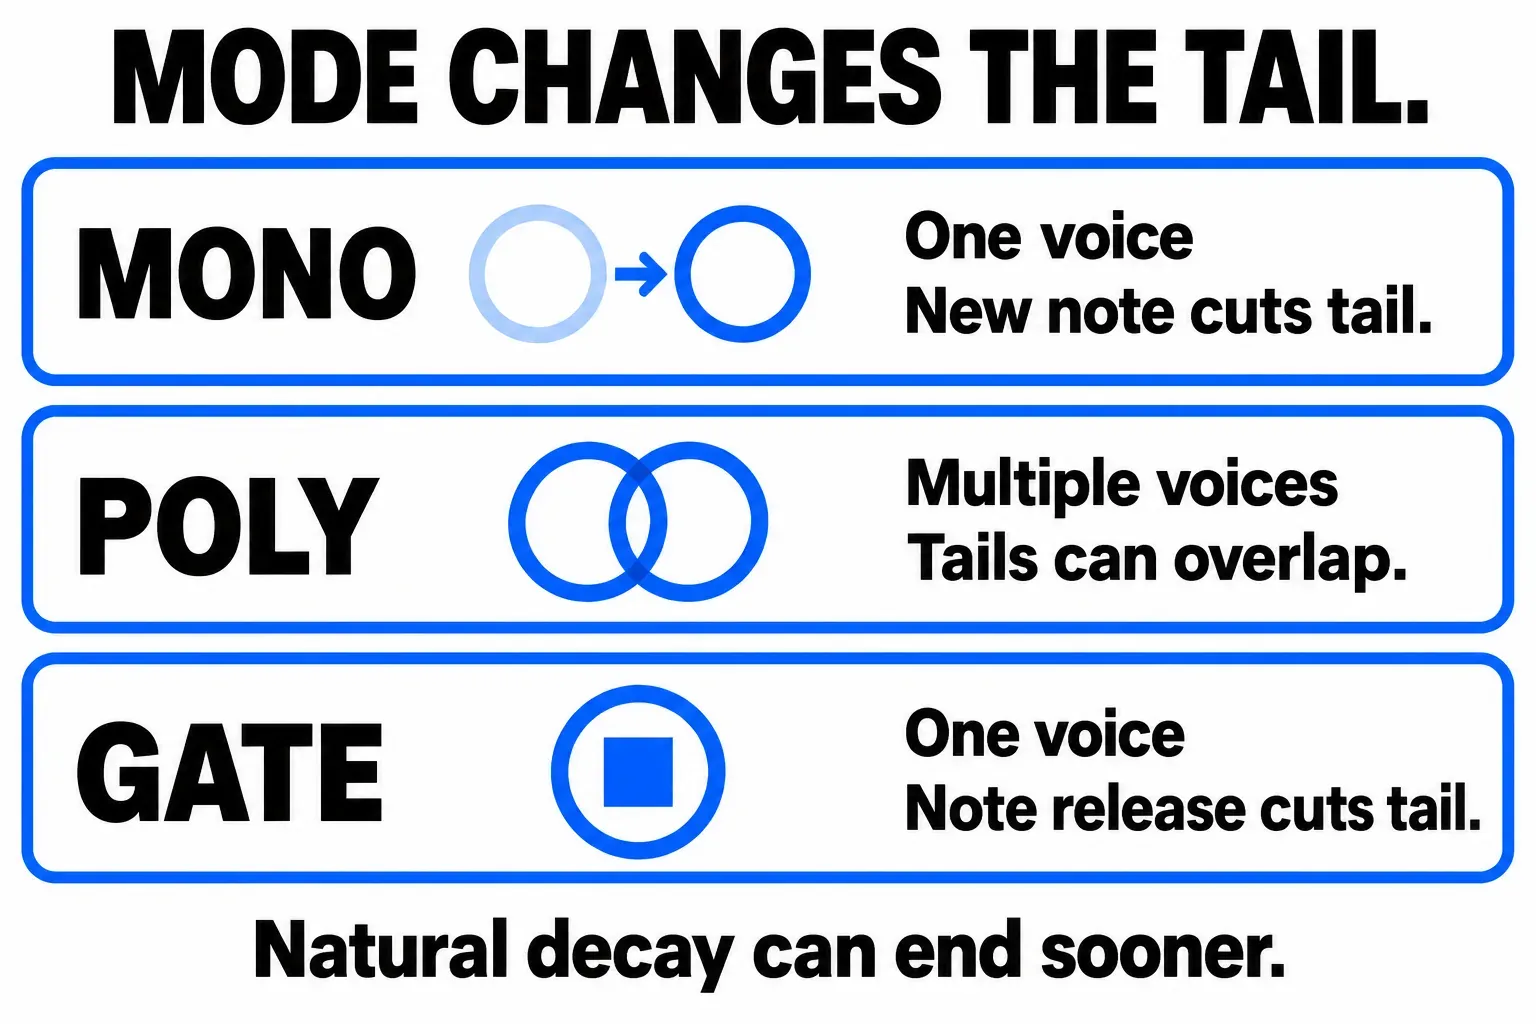
Try the same two separated notes with a long Decay. In Mono, the second note interrupts the first voice. In Poly, their tails can overlap. In Gate, shortening a note can cut its sound sooner. Apple defines these three playback modes separately from the sound-type controls. If changing note length seems ineffective, check Mode before redrawing the whole region.
Save the voice, then build the kit
Save the project to keep its current plug-in state. To reuse this individual sound elsewhere, open the plug-in header’s Settings menu and choose Save Setting As. Give the sound a useful name before exploring another type. Apple’s settings instructions distinguish Save Setting As, which saves a new named setting, from Save Setting, which overwrites the existing setting.
For a full kit, use several software instrument tracks or load Drum Synth voices within DMD. Keep track-level sound design separate from whole-kit decisions. Editing one snare voice should be a deliberate action, and a standalone voice preset isn’t a saved multi-instrument kit. The DMD guide covers pad selection, routing and saving that larger setup.
If you keep separate tracks, select them, choose Track > Create Track Stack and pick Summing stack. With the main track selected, you can mute, solo and add plug-ins for every voice at once, and a patch saved there can include all the subtracks with their plug-in settings. Program the parts on the subtracks, though: MIDI on the main track plays every software instrument subtrack together.
If you need deeper synthesis, Apple also supports loading Drum Synth settings into Ultrabeat. Its overview describes replacing Drum Synth with Ultrabeat on the channel strip and automatically loading the sound as the typical route. Save the original setting and project first. More controls only help when you know which part of the voice you need to change.
Once the sounds work together, write the rhythm in Step Sequencer or a MIDI region. Keep this sound-design pass focused: a suitable voice, deliberate pitch behavior and a controlled tail give the pattern a much better starting point. The Create Music guides cover the next composition steps.


