How to Make Vocal Chops in Logic Pro: Build a Playable Hook
A good vocal chop needs a useful syllable and a rhythm with space. Build the hook in Slice mode, then use Classic when one vowel needs to become a melody.

To make vocal chops in Logic Pro for Mac, load a vocal phrase into Quick Sampler, choose Slice and map a few useful fragments to keys. Record a new rhythm from those fragments, leaving gaps for the rest of the song. If you want to play one syllable as a melody, use Classic instead: moving a MIDI note in Slice normally selects a different fragment.
I’d build the dry hook before adding a large effect chain. A recognizable vowel, a clear attack and one good pause do more for the phrase than another layer of reverb.
Choose a phrase that gives you something to play
Start with your own recording or a vocal sample you have permission to use. Keep the original file. A short, fairly exposed phrase is easier to reshape than a full mix with drums and chords already behind it. If you need a new source, the vocal recording guide covers capture. This guide starts with usable audio.
Listen for three different jobs: a crisp attack that can mark the rhythm, a vowel that carries the singer’s tone, and a contrasting syllable that can answer the first two. They don’t need to be complete words. Avoid selecting three near-identical breaths and expecting the keyboard to create a melodic identity for them.
Decide whether you want the sound of the existing track processing. Apple explains that dragging a region into Quick Sampler bounces its track processing into the sample, including audio plug-ins and Flex. Drag the original audio file when you want an unprocessed source. Choosing Original doesn’t undo effects already printed into a region bounce.
Make a few playable chops, then stop slicing
Use the following setup to get to the musical part. For more detail on loading, modulation and saving, follow the Quick Sampler tutorial.
- Drag the vocal file into the empty area below the track headers and choose Quick Sampler (Original). Original preserves the source’s tuning, level, looping and length characteristics; Optimized can retune, change level, find loops and crop silence. Start from the version whose changes you actually want.
- Choose Slice. With Mode set to Transient, lower Sensitivity until the keyboard offers a manageable set of fragments. Detection finds changes in the audio, not necessarily the syllables you would choose musically.
- Play the slices and choose three useful ones. Call them A, B and C in your notes. These letters identify fragments, not musical pitches. Keep their displayed trigger keys beside those labels.
- Adjust each chosen boundary so the attack is intact and the next unwanted syllable stays out. Click in the waveform to add a marker, drag one to move it, or double-click the marker itself, not its handle, to delete it.
- Turn Play to End off for isolated chops. Otherwise a triggered slice can continue to the sample’s end marker, carrying later words into the hook.
These are the documented Slice controls and marker operations. If a boundary refuses to land where the syllable starts, check the waveform’s Snap setting. Zoom in, then judge the sound of the edge rather than the apparent size of its waveform peak.
Keep the consonant when the word’s identity matters. For a rapid stutter where the vowel seems to arrive late, try a second boundary inside the vowel and compare it with the full attack against the song. Choose by the rhythm and tone you want, then recheck the adjoining slice before committing the boundary.
A marker is also the boundary of its neighbor. After moving one, play both adjoining slices. Delete a marker that splits one useful word into a strong attack and a useless leftover consonant. Do this before you write the final MIDI part, because changing the slice count can change which fragment a trigger key selects.
Build a two-bar hook with three fragments
Put the chops against a simple drum or chord backing. Start with rhythm and repetition. Don’t try to make every slice in the source earn a place.
Here is a starting exercise in 4/4. Divide each bar into eight equal eighth-note positions. Use A, B and C for your chosen fragments and leave the other positions silent:
- Bar 1: A on positions 1 and 3, B on 4, C on 6, B on 7. Rest on 2, 5 and 8.
- Bar 2: A on 1, C on 3, B on 4 and A on 6. Rest on 2, 5, 7 and 8.
The first A establishes the sound. The second bar changes the answer and leaves the end open for the next phrase. Use this as a composition prompt. It isn’t a finished pattern that fits every vocal. A long breathy fragment may need more room, while a short consonant can support a tighter repeat.
On the Quick Sampler track, record the trigger keys as a software-instrument performance. In Logic’s default key commands, R starts recording and Space stops it. The notes become a MIDI region. Apple describes recording software instruments. Edit that region’s positions and lengths until the pattern leaves space around the lead vocal. If a good take happened while Logic wasn’t recording, press Shift-R or click Flashback Capture in the control bar with the Quick Sampler track focused. Logic creates a MIDI region from your most recent performance at the playhead.
If you prefer to begin with the source timing, choose Copy MIDI Pattern in Quick Sampler’s Action menu and paste it onto the same instrument track. That gives you a starting map of the slices. It isn’t a newly composed hook. Apple’s slice-to-MIDI instructions also describe dragging the pattern from the lower waveform area. Remove notes, repeat a useful fragment and move events away from the original word order.
Make note length control the hook
Turn Gate on when short and long MIDI notes should shape the phrase. Releasing a key then starts the release phase of the Pitch, Filter and Amp envelopes. It doesn’t guarantee immediate silence, because the Amp release still affects the tail. With Gate off, the slice plays in one-shot fashion. These behaviors are part of Apple’s Slice mode reference.
Shorten the Amp release enough for the rests to remain audible. If a cut clicks, avoid forcing every edge to the shortest possible value. Click a slice marker handle to expose Fade in and Fade out below the waveform. A small fade can soften a boundary. Those fade values apply to all slices, so recheck the attacks you wanted to keep.
Make this decision with delay and reverb bypassed. Once the dry rhythm works, bring the effects back and check whether their tails fill the pauses you deliberately wrote. For a lead vocal and a chop hook competing for the same moment, removing a chop is often the cleaner arrangement decision.
Play one syllable as a melody without changing slices
In Slice, the note selects a fragment. Start Key chooses the first trigger key. Chromatic, White or Black mapping determines the keys used above it. A key’s displayed note name doesn’t tell you the sung pitch of that fragment. Moving a trigger note up a third can select a different syllable instead of transposing the one you liked.
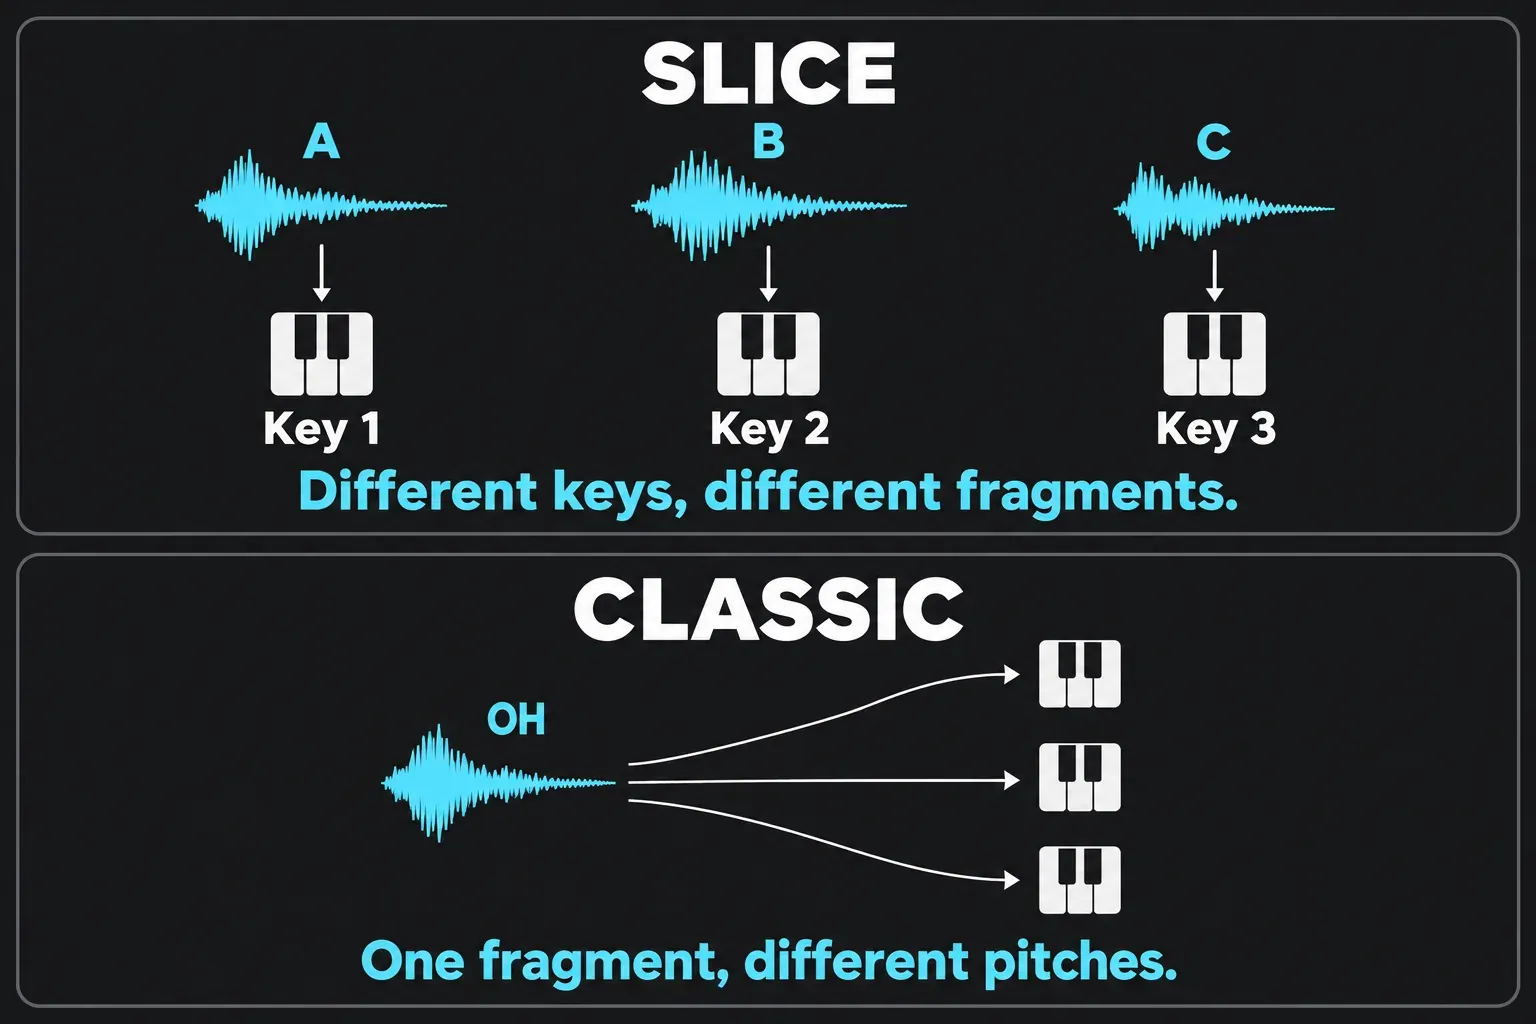
For a tune played with one vowel, keep the Slice track and make a separate Quick Sampler instrument. Load the source, select Classic, set the blue start and end markers around the wanted vowel and choose No Loop for an initial one-pass sound. The same selected audio now maps above and below a Root Key, as Apple explains in the Classic mode guide.
Set Root Key to the note that should reproduce the sample at its original pitch, then use Tune for a small correction if needed. This mapping does not repair a sliding or unstable sung note. For that separate task, use the Flex Pitch guide before building the instrument.
Try a short melody at the root, three semitones above it, five above it and back to the root. Those are relative intervals for an exercise. They don’t mean the source is in your song’s key. Change the notes to fit the harmony and listen for vowel changes as you move away from the original pitch.
Without Flex, higher notes play faster and lower notes play slower. For suitable tempo-aware audio, Flex can preserve playback speed while pitch changes. Follow Tempo is a separate switch used with Flex to match project tempo. Apple’s Flex instructions list the eligible material, including Apple Loops, Logic regions, bounced audio and files analyzed with Smart Tempo. Do not expect an arbitrary loose file to synchronize just because its filename includes a BPM.
Finish the phrase and keep it reusable
Set the hook’s level against the song, then add filtering, delay or reverb for a specific role. A short dry phrase can answer the singer. A wider sustained vowel can fill a gap between lines. Start by choosing that role. More processing won’t fix the wrong fragment or a hook that interrupts every lyric.
If only a few audible cuts are needed, arranging short audio regions directly can be simpler than building a playable instrument. Keep that option for an occasional transition. To make those cuts, select the audio region, move the playhead to the cut point and choose Edit > Split > Regions at Playhead, or select the Scissors tool and click and hold the region. Hold Option while cutting with the Scissors tool to divide the region into pieces the same length as the first segment. Use the sampler when you want to perform, repeat or rewrite the phrase as MIDI.
For a stutter on a vocal you don’t need to play from a keyboard, Beat Breaker handles it as an insert effect. Choose Multi Effects > Beat Breaker in the channel strip’s Audio Effect plug-in menu. It slices, reorders and processes the incoming audio in real time, and Randomize generates new slice settings when you want a fast variation.
Save the instrument with Settings > Save As under a new name, because Save can overwrite an existing Quick Sampler instrument. Save a Library patch if you want the instrument together with its associated plug-in settings. Apple distinguishes these instrument and patch saving options. Keep the MIDI region and audio assets with the project, using the relevant copy options in File > Project Settings > Assets. MIDI trigger notes alone aren’t the source recording.
When the hook gives the wrong result
- The next word leaks in: check the slice boundary and turn Play to End off. Then check whether the apparent extra word is an effect tail.
- Short MIDI notes still ring: enable Gate, inspect Amp release and bypass delay or reverb while setting the dry length.
- Moving a note changes the word: you are selecting another slice. Use a separate Classic instrument for a melody from one vowel.
- The sample changes speed or drifts: distinguish pitch-dependent playback from project-tempo following, and check the file’s tempo information before enabling Flex and Follow Tempo.
- Changing Sensitivity removes a chosen marker: set that marker to Ignore Sensitivity. Apple’s protected-marker instructions explain the orange colour and note that manually created markers ignore Sensitivity by default.
Keep the version that works with the song playing. The useful result is a phrase you can recognize, vary and leave out when the arrangement needs space. The Create Music hub covers the surrounding beat, harmony and arrangement decisions.


