Sidechain Compression in Logic Pro: Complete Workflow
A complete Logic Pro sidechain workflow for kick and bass, vocal ducking, bus and ghost triggers, detector control and routing fixes.

To sidechain in Logic Pro, put Compressor on the channel you want to turn down, then choose the trigger in the Side Chain menu at the top of the plug-in window. For kick-versus-bass ducking, Compressor goes on the bass and the kick is the external side-chain source. The kick drives the detector. It doesn’t pass through the bass Compressor.
Checked against Apple’s Logic Pro for Mac documentation on September 12, 2026. Start with the direct kick-to-bass setup below; use the bus and ghost-trigger sections when you need a separate control pattern or several sources.
Sidechain is an optional problem-solving stage in the complete Logic Pro mixing workflow, not a compulsory effect. Start with the hub when kick and bass might just need a different balance, arrangement, EQ or envelope before you build a trigger path.
Fast setup: insert Dynamics > Compressor on the destination, turn Auto Gain off, set Mix to 100% in the Output panel, then choose the trigger in the plug-in header’s Side Chain menu. Play both parts and lower Threshold until gain reduction follows the trigger. Set Ratio for depth, turn Auto Release off while adjusting recovery manually, and shape Attack and Release by ear.
Sidechain compression has two signal paths
Ordinary compression listens to the same channel it processes. External sidechain compression splits those roles:
- Destination: the audible signal passing through Compressor and being reduced, such as bass, pad, music bed, reverb return, or another bus.
- Trigger: the separate signal feeding Compressor’s detector, such as a kick, vocal, percussion part, control click, hardware input, or bus.
Apple’s plug-in window guide confirms that a side-chain-capable plug-in can use an audio track, software-instrument track, hardware input, or bus as its source. The selected signal controls the plug-in, but it doesn’t get processed by it.
Set up kick and bass sidechain compression
- Name the tracks clearly. Use names such as Kick and Bass so the source menu is unambiguous.
- Insert Compressor on Bass. Choose Dynamics > Compressor in an Audio Effect slot. Select Platinum Digital if you want to follow the Peak/RMS controls described below; other models do not expose every control.
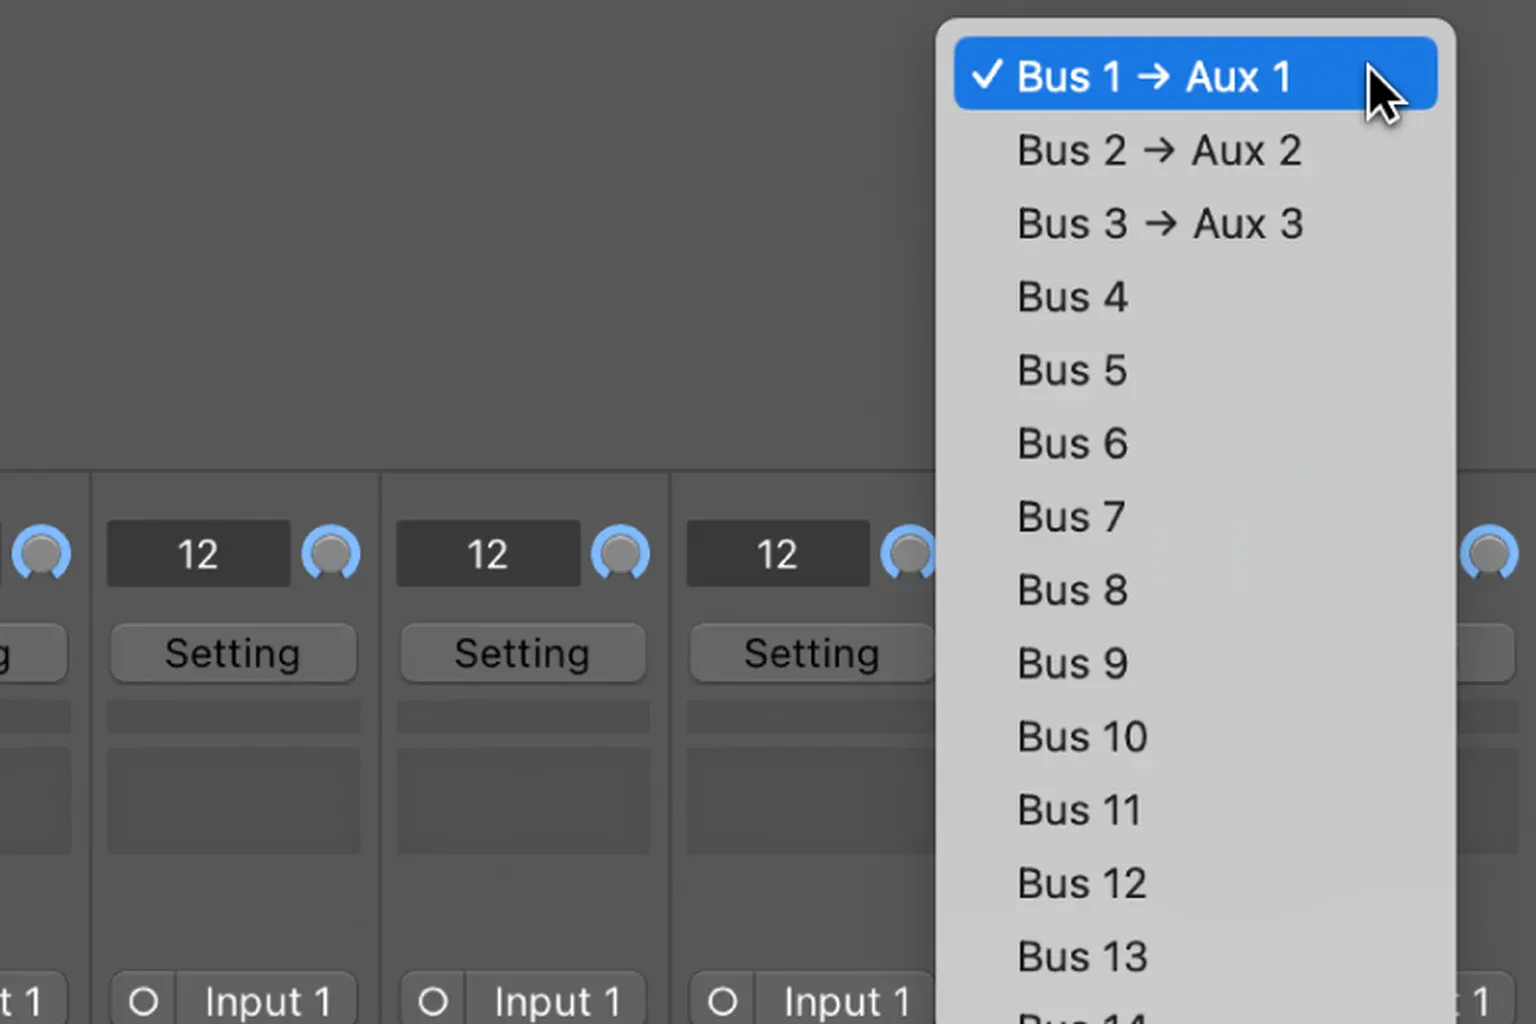
- Open the Side Chain menu in the plug-in header. This is above the Compressor interface, not the Side Chain button inside it. If the header is hidden, click the icon at the top-right corner of the plug-in window to show it.
- Choose Kick. Search the menu if the project has many tracks and buses.
- Open Compressor’s Side Chain panel. Start with its filter off so the full kick reaches the detector.
- Turn Auto Gain off and set Mix to 100% in the Output panel. This stops automatic level compensation and lets you hear the fully processed destination while setting the ducking depth.
- Play kick and bass together. Lower Threshold until gain reduction appears only when the kick triggers it.
- Set Ratio for depth. Use enough reduction to create the intended separation without making the bass vanish.
- Shape Attack and Release. Turn Auto Release off for this manual timing adjustment. Make the duck begin quickly enough, then let the bass return in time with the groove.
- Bypass in the full mix. Match output and confirm that the low end is clearer or the movement is musically useful.
For kick and 808, treat the 808 as the bass destination unless you deliberately want a different sound to move. Put Compressor on the 808, select the kick as the trigger, and check that the 808 returns before its next important note. Do not force deep ducking when arrangement, note length, tuning, or envelope is the real collision.
Apple’s Compressor side-chain workflow uses the same core sequence: insert Compressor, pick the source in the plug-in header, pick a detection method, and adjust the compressor. If gain reduction doesn’t move, diagnose the route before pushing the settings harder.
Set Threshold and Ratio from the amount of ducking
Threshold decides which trigger events produce reduction. That value belongs to the level arriving at the detector, so copying a threshold from another project won’t hold up. Lower it while the relevant section plays, and watch whether every intended kick, word, or control pulse crosses it.
Ratio controls how strongly the destination is reduced once the detector crosses Threshold. For transparent space, use a lower ratio and shallower threshold action. Go firmer when rhythmic pumping is the sound you’re after. Judge the destination, not the loudness of the trigger.
If only some trigger hits work, don’t drop Threshold straight to the floor. Check velocity variation, source processing, send level, and the detector filter. A dedicated control signal is often steadier than forcing a musical kick with shifting accents to perform two jobs.
Use Attack and Release to shape the space
Attack controls how quickly the destination is reduced after the trigger crosses Threshold. A faster attack separates the two sooner, but it can make the destination click, lose its front edge, or sound abruptly chopped. A slower attack keeps more of the onset, though the bass or pad can collide with the trigger before reduction develops.
Release controls how quickly the destination returns after the trigger falls back below Threshold. Too short can chatter or click; too long can hold the bass or reverb down into the next event. Turn Auto Release off while setting a manual recovery time. With Auto Release on, recovery adapts to the material and also depends on the Release knob, so that knob alone does not describe a fixed recovery time.
There’s no universal “house sidechain” release time. Kick length, pattern, tempo, bass envelope, compressor model, Threshold, and Ratio all change the result. For a deliberate pumping effect, the audible swell may be the goal. For transparent ducking, the listener should notice the separation rather than the gain movement.
Use the detector filter without EQing the destination
Logic Compressor’s Side Chain panel gives you LP, BP, HP, parametric, and high-shelf filters plus Frequency, Q, and Gain. These controls shape the signal reaching the detector. They don’t filter the audible bass, pad, voice, or reverb return.
Apple’s side-chain parameter reference also provides Listen, which lets you hear the detector path while adjusting it. After auditioning, select On to keep the filter active or Off to return to unfiltered detection; do not leave Listen selected when judging the mix.
- Direct kick track: start with the detector filter off. The source may already be clean enough.
- Full drum loop: use Listen and test a low-pass or band-pass shape if only the kick should trigger reduction.
- Vocal trigger: filter rumble or other energy only when it causes false triggering.
- Bass-heavy mix bus detector: a high-pass detector filter can reduce low-frequency overreaction, but that remains internal compression unless you select a separate kick or bass source in the plug-in header.
If the filter removes the very component meant to trigger Compressor, gain reduction stops. Turn the filter off as the first troubleshooting comparison.
Choose Max or Sum and Peak or RMS deliberately
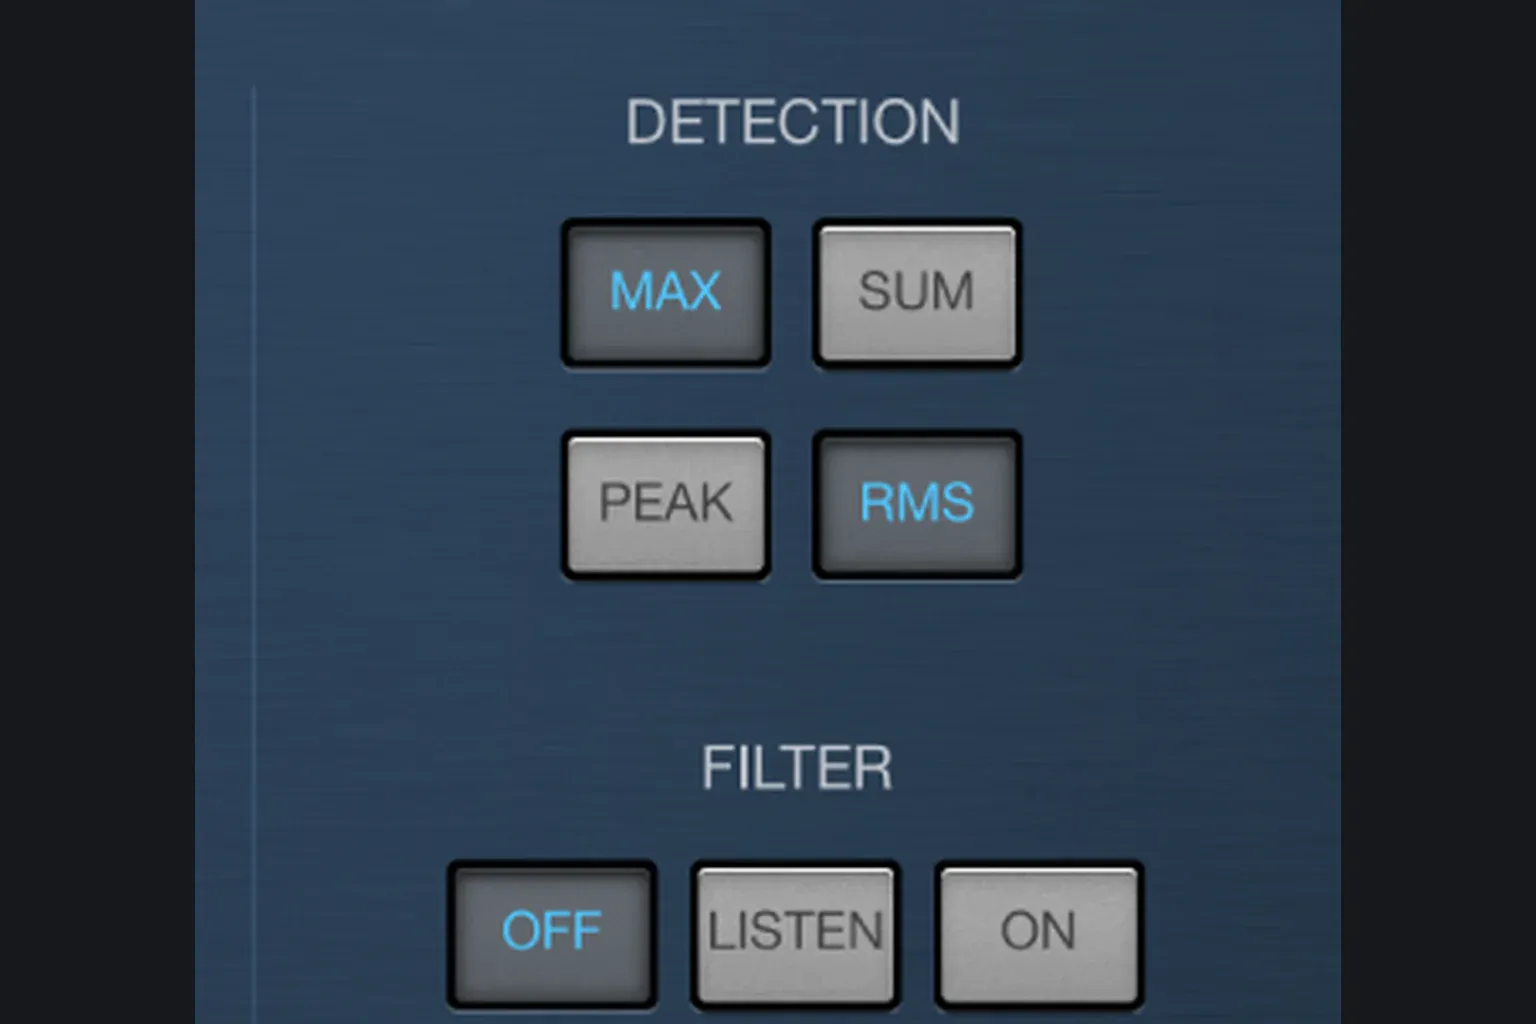
For stereo side-chain sources, Max makes both destination channels compress when either side of the trigger meets the detector condition. Sum bases the decision on the combined trigger level. Compare them when a stereo trigger makes the image pull or the detector reacts inconsistently.
Peak/RMS selection is available with Platinum Digital; not every Compressor model exposes these controls. Peak follows short peaks, while RMS uses an averaged level. Try Peak for a short kick or click, and compare RMS for a sustained trigger. These are starting choices, not requirements: listen for clicks and check how detection interacts with Max/Sum and Attack.
Use a bus when several signals must trigger one compressor
A direct track source is simplest for one kick and one bass. Use a dedicated trigger bus when several kicks, percussion layers, or vocal channels must control the same Compressor, or when the detector needs its own stable level. If bus and aux roles aren’t clear, map the route first with the Logic Pro buses, sends and aux guide.
- Choose an unused bus and name its aux Sidechain Trigger. Set this detector-only aux’s Output to No Output; otherwise its return can add another audible copy of the trigger to the mix. Leave the original source’s main output as intended.
- Create sends from each trigger source to that bus.
- Choose Pre Fader when trigger strength must remain independent of source fader and pan moves.
- Balance the send levels so the combined trigger represents the control you want.
- Select that bus in Compressor’s Side Chain menu instead of selecting each source individually.
- Press play and verify that the gain-reduction meter follows all intended events.
Apple’s send-routing documentation confirms that Pre Fader is unaffected by the source fader and pan. Post Fader follows volume. Post Pan follows both volume and pan. Pick the tap point by whether mix moves should also change the detector.
Build a silent ghost trigger you can verify
A ghost trigger is a dedicated control pattern that isn’t meant to be heard. It keeps ducking independent of the audible kick’s sample length, fill pattern, or mute automation.
- Create an audio or software-instrument track containing the control pulses.
- Set the trigger track’s Output to No Output so its main path cannot reach Stereo Out.
- Send the trigger track Pre Fader to a dedicated bus named Ghost Trigger. Raise its Send Level so the bus receives the pulses; choosing a bus and tap point alone is not enough.
- Set the receiving aux channel’s Output to No Output so the bus return is also silent.
- Keep the trigger track and aux active; do not use Track On/Off to silence them.
- Select the Ghost Trigger bus in each destination Compressor’s Side Chain menu.
- Verify the gain-reduction meters during normal playback.
- Bounce a short test and confirm the ducking survives the exact offline and solo workflow you will use.
No Output on the trigger track silences its main channel path. No Output on the aux silences the bus return. The Pre Fader send still feeds the dedicated detector bus independently of the trigger track’s fader and pan. Keep the route simple and avoid sending the destination back into its own trigger bus.
Ducking a vocal, music bed, or reverb return
Make instruments yield to a vocal
Place Compressor on the instrument bus and choose the lead vocal or a clean vocal bus as the trigger. Use modest gain reduction and a release that restores the music between phrases without an obvious inhale. This can improve intelligibility, but arrangement, automation, and tonal masking still matter.
Duck a reverb behind the dry vocal
Send the vocal to a reverb aux, then place Compressor after the reverb on that aux. Choose the dry vocal as the side-chain source. While the singer performs, the return moves down. After the phrase, Release lets the tail rise. The dry vocal stays outside that Compressor.
The Logic Pro vocal-mixing workflow explains how editing, EQ, compression, de-essing, shared effects, and automation work around this route. If every syllable should move the reverb by a different amount, automate the send or return instead of forcing one detector setting to solve the whole performance.
Sidechain compression does not automatically fix masking
Kick-to-bass ducking turns down the entire bass signal for a moment. That creates time-domain space, but it doesn’t selectively remove only the overlapping frequencies. If the kick and bass still sound muddy between hits, inspect arrangement, octave, envelope, phase relationship, and EQ rather than pushing ducking until the bass disappears.
A short kick and well-shaped bass may already coexist. Bypass at matched output and keep the sidechain only when it improves clarity, headroom, groove, or an intentional pumping effect.
Troubleshoot sidechain compression in Logic Pro
For recording-versus-playback problems, Apple’s plug-in latency guide explains that Low Latency Monitoring affects the focused instrument track and input-monitored or record-enabled tracks, disabling their sends unless marked Low Latency Safe. The mode is inactive during bounce, so a bounce can differ from that monitoring state. Plug-in latency compensation also covers side-chain signals.
| Symptom | Diagnose and fix |
|---|---|
| No gain reduction | Check: Compressor is on the destination, the correct source is selected in the plug-in header, the trigger is active, and Threshold is crossed. |
| Source missing from menu | Check: the track or bus still exists, has a clear name, and appears under the correct Audio, Instrument, Input, or Bus group; use the menu search. Active material matters for triggering gain reduction, but it is not what makes a valid source appear in the menu. |
| Only some hits trigger | Check: trigger velocity/level, pre/post-fader send position, detector filter, Threshold, and source processing. |
| Destination clicks | Check: overly fast Attack/Release, excessive Ratio/Threshold action, and a trigger with abrupt edges. |
| Destination never returns | Check: Release is too long, the trigger tail is long, or several bus sources overlap. |
| Ducking changes with trigger fader | Check: the bus send is Post Fader/Post Pan; switch to Pre Fader if independence is intended. |
| Ducking disappears in solo or bounce | Check: the trigger track and bus remain active and included; test the actual bounce route instead of assuming mute/solo behavior. |
| Stereo image moves | Check: Max versus Sum, Peak versus RMS where the selected model offers them, and whether the stereo trigger is strongly unbalanced. |
| Gain reduction moves but effect is unclear | Check: Auto Gain, too-low Ratio, Mix below 100%, or reduction that is too shallow to hear in the full mix. A steady bass can still duck; its stable level is not itself a fault. |
| Trigger send stops while recording | Check Low Latency Monitoring: affected Send slots turn gray with orange text. Compare with the mode off, or use Low Latency Safe for the required send and check whether the resulting monitoring delay is acceptable. |
| Sidechain timing shifts with plug-ins | Check Logic Pro > Settings > Audio > General > Compensation. Choose All when aux or output channels also contain latency-inducing plug-ins. Do not add an arbitrary track offset before checking compensation. |
Final sidechain checklist
- Compressor is inserted on the destination that should duck.
- The trigger is selected in Logic’s plug-in header Side Chain menu.
- The detector receives the trigger; the destination remains in Compressor’s audible processing path.
- Auto Gain is off while depth and timing are set.
- Threshold catches the intended trigger events.
- Ratio creates only the required amount of separation.
- Attack clears the collision without clicking or chopping the destination.
- Release returns before the next important destination event.
- The detector filter is off unless it solves a defined false-trigger problem.
- Bus send position matches whether fader and pan should affect detection.
- Playback, solo, and bounce all preserve the trigger route.
- The full mix improves after a level-matched bypass.
Use the Logic Pro tutorials hub for the surrounding recording, routing, automation, and mix workflows. For level changes that must follow musical sections rather than another signal, the Logic Pro automation guide is the more direct tool.
Frequently asked questions
Is sidechain compression necessary?
No. Use it when one signal should create repeatable gain reduction in another, such as a kick making room in a sustained bass or a vocal ducking a music bed. Skip it when balance, arrangement, envelope, EQ, or automation solves the collision more directly. A matched bypass should prove that the route improves clarity, groove, or an intentional pumping effect.
Where does Compressor go for kick and bass sidechaining?
Put Compressor on the bass, because bass is the destination being reduced. Choose the kick as the source in the Side Chain menu at the top of the plug-in window.
Why is sidechain compression not working in Logic Pro?
Check the insert location, selected source, active trigger signal, Threshold, Ratio, Mix, Auto Gain, and detector filter. For a bus trigger, check Send Level and whether Low Latency Monitoring disabled the send. The gain-reduction meter should respond to the trigger.
Does the sidechain signal pass through Compressor?
No. The external source controls Compressor’s detector; it is not routed through the destination’s audio-processing path.
Should a sidechain bus be pre-fader or post-fader?
Use Pre Fader when detector level must ignore source volume and pan changes. Use Post Fader or Post Pan when those mix moves should also change the trigger.
How do I make a ghost trigger silent in Logic Pro?
Set the trigger track’s Output to No Output, send it Pre Fader to a dedicated bus at a working Send Level, set the receiving aux Output to No Output, and select that bus as Compressor’s side-chain source. Keep the route active and verify playback and a short bounce.
What do Attack and Release do in sidechain compression?
Attack sets how quickly the destination turns down after the trigger crosses Threshold. Release sets how quickly it returns after the trigger falls below Threshold. Turn Auto Release off for manual timing; when enabled, it adapts recovery to the material in conjunction with the Release knob.
Does sidechain compression fix kick and bass frequency masking?
It can create time separation by lowering the whole bass signal around each kick. It does not selectively repair every overlapping frequency, so arrangement, envelope, phase, and EQ may still need work.


