How to Draw and Record MIDI CC in Logic Pro
Put expression inside the MIDI region, choose the right controller and check what the instrument actually receives. Mapping a knob to the mixer is a separate job.

To draw MIDI CC in Logic Pro, open a MIDI region in the Piano Roll, click Show/Hide Automation, switch the lower lane to Region, then choose the MIDI controller you need from the Automation/MIDI parameter menu. Draw the movement in that lane. For a performed pass, record the controller’s incoming MIDI messages onto the instrument track.
The important choice comes before drawing: should the movement be part of the instrument performance, or should it operate a Logic mixer or plug-in parameter? I’d put a phrase’s expression in the MIDI region and keep a vocal fader ride in track automation. A hardware knob can do either job, which is where the confusion starts.
This guide covers Logic Pro for Mac. The goal is an editable controller performance. A new hardware-control setup isn’t part of it.
Choose MIDI CC or parameter automation first
A MIDI Control Change message identifies a controller number, a value and a MIDI channel. When recorded, it also has a position in the region. CC11 with a value of 80 on channel 1 is different from CC1 with the same value, and neither means “move whichever knob I last clicked.” The receiving instrument decides how to use the message.
| Your task | Start here | What to check |
|---|---|---|
| Add expression, modulation or sustain to a MIDI part | Region MIDI CC data | Controller number, channel and instrument response |
| Ride the mixer or automate a named effect control | Track or region parameter automation | The actual named parameter and automation mode |
| Make a physical knob operate a screen control | Controller Assignments or Smart Controls | Assignment target and scope |
Apple’s track and region automation guide explains why region data travels when you copy or move its region. A region can also contain ordinary instrument-parameter automation, so selecting Region alone doesn’t prove you’re editing a MIDI CC. Read the parameter name too.
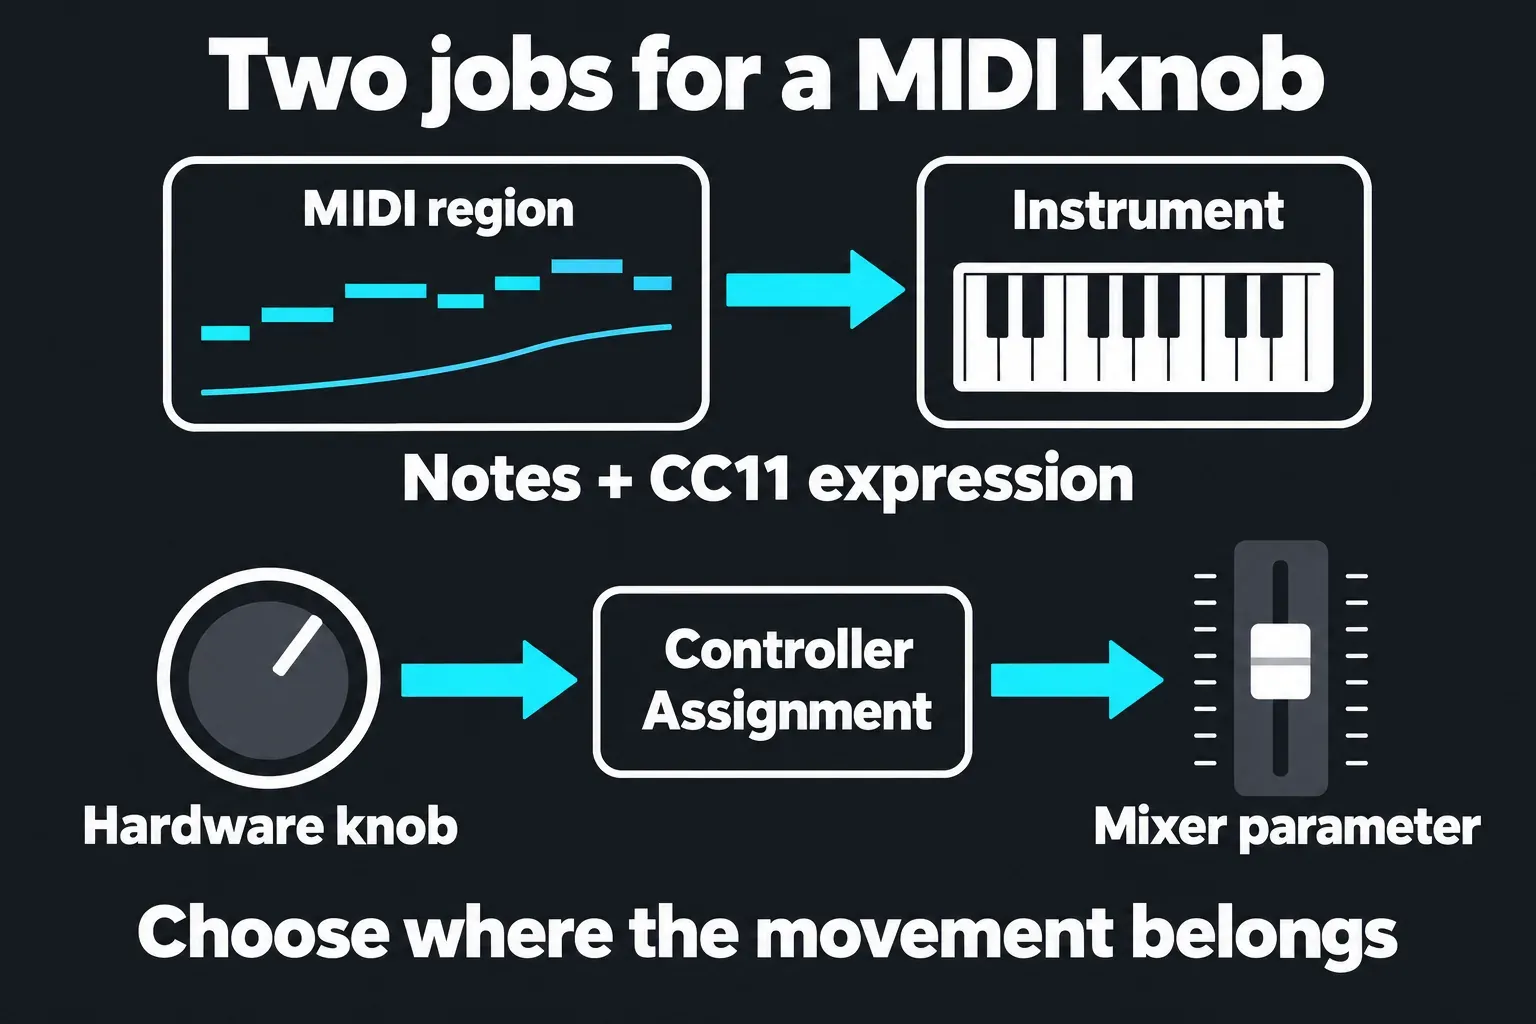
For the setup side, follow assigning a MIDI controller in Logic Pro. For Touch, Latch and mixer moves, use the automation guide. Neither assignment learning nor a moving screen knob guarantees that raw CC events were recorded into your region.
Draw a controller movement without hardware
Work on a duplicate of the region if it contains a performance you want to preserve. Use a patch whose MIDI response you understand. A correctly drawn curve can do nothing if the instrument doesn’t use that controller.
- Select the MIDI region and double-click it to open the Piano Roll.
- Click Show/Hide Automation in the Piano Roll menu bar. The Automation/MIDI lane opens below the notes.
- Set its Automation button to Region.
- Open the Automation/MIDI parameter menu and choose the required MIDI controller entry and channel. Choose Expression for CC11 or Modulation for CC1 when that is what the patch expects.
- With the MIDI controller lane visible, drag across the required part of the region to create a series of MIDI data points. Start with a simple rise or fall.
- Adjust the points for timing and value. Begin playback before the movement and listen through its end using the actual patch.
Apple documents the Piano Roll’s Region selector and controller menu, and its MIDI data-point instructions specifically describe dragging across a region to create a series of events. You don’t need to buy a controller or enter Write mode to draw this data. You can also draw it in the Tracks area. Choose Mix > Show Automation, click the track header’s Automation button to switch to region automation, then pick the controller from the MIDI section of the Automation Parameter menu.
If the menu says Note Velocity, you’re editing the strength of existing notes. A line there changes velocity where notes intersect it. It doesn’t create a continuous CC11 swell between them. Choose the controller entry before drawing again.
Give a phrase an intentional start and finish
As an educational starting point, imagine a held string phrase with CC11 set to 70 at its start, rising toward 100 through the middle, then falling toward 60 at the release. These are editing choices. They aren’t a measured sweet spot or a library preset. Set the first value before the note needs it, then adjust the range to the patch and arrangement.
Do not leave the next phrase dependent on whatever value happened to play earlier. Give each independently reusable phrase a sensible starting value. If the sound changes when you start halfway through a region, investigate chase behavior rather than redrawing a curve that already works from the beginning.
Know which CC the instrument expects
The MIDI Association’s controller table defines the conventional names and value ranges below. A plug-in or sample library can use a custom mapping, so its current manual and patch settings decide the audible result.
| Controller | Conventional role | Practical caution |
|---|---|---|
| CC1 | Modulation wheel | May control vibrato, dynamics or another mapped destination |
| CC7 | Channel volume | Can also affect Logic’s channel-strip fader under a project setting |
| CC11 | Expression | Check how the instrument combines it with its other level or dynamics controls |
| CC64 | Sustain pedal | Conventional switch behavior is off at 0 to 63 and on at 64 to 127 |
| CC74 | Brightness | Not a promise that every instrument maps it to filter cutoff |
For ordinary 7-bit CC values, the range is 0 to 127. That makes a sustain lane a poor place for a decorative smooth swell. Use 0 for an unambiguous pedal-up event and 127 for pedal-down unless the instrument explicitly supports a different pedal response. Pitch bend is a separate MIDI event type. It isn’t another controller number in this table.
With an orchestral instrument, find out whether one control changes dynamics or sample layers while another changes expression. Raising the same curve on both isn’t automatically a better performance.
Record expression over notes you already have
Preserve the region before an overdub. Open Logic Pro > Settings > Recording and check Overlapping Track Recordings: MIDI for the mode you will use. Cycle On and Cycle Off have separate choices. Apple’s recording settings reference confirms that Merge combines the new MIDI data with overlapping regions, while Overlap keeps a separate region and plays the MIDI data from both.
- Select the software instrument track that plays the existing region.
- Confirm the physical control sends the intended CC and that the instrument responds. A controller’s preset can change its outgoing number or channel.
- Choose the desired overlap behavior. Use Merge for a deliberate pass into the existing performance; avoid Replace when you want to preserve it.
- Start recording before the phrase, move only the control you intend to record, then stop.
- Open the resulting region’s controller lane. Confirm that the new events are present and the original notes remain.
When capturing region automation from mapped controls in Read mode, also check Record Automation with MIDI Regions in the track’s Automation Mode menu. Apple’s automation mode reference says this region-recording option is enabled by default and can be changed for one track or all tracks of that type. Read isn’t a blanket prohibition on recording region information.
After a pass, inspect the result. Don’t assume another pass will improve it. Overlapping CC events on the same channel can compete. If you need the underlying recording choices, the MIDI recording workflow covers takes and overdubs in more detail.
For an optional separate CC lane in the arrangement, select the instrument track and choose Track > Other > New Track With Same Channel. Select the new track for the controller-only recording pass, then confirm its region contains CC events and the original notes remain on the first track. Both tracks use one instrument and channel strip. Their mixer settings are shared, and competing CC events of the same type and channel still reach the same destination.
Use the Event List when the curve is ambiguous
Open View > Show List Editors, then click Event. The Event List exposes individual events for numerical inspection. Check the event type and position, then inspect Ch for the channel, Num for the controller number and Val for its value. A controller number and a MIDI channel are different fields.
To add an exact event, select an existing MIDI region, put the playhead at the intended position, choose the controller event type from the Event Type menu, then click +. Set its number, value and channel for the receiving instrument. Apple’s event creation instructions require an existing selected region and place the new event at the playhead. A Program Change event is a different message. Don’t choose it just because you want to change a device setting.
A pass recorded on the wrong controller doesn’t have to be played again. Say you rode the mod wheel, but the patch expects CC11. In the Event List, use the event type buttons to show only controller events, select the CC1 events, then change the number in the Num column of one of them from 1 to 11. Apple’s guide to changing event values explains that an edit to one selected event changes the same parameter in every event in the selection.
For an external instrument, also verify the destination port, receiving channel and device’s own MIDI implementation. Logic’s generic controller label doesn’t know what every hardware unit assigns to that number.
Fix the failure you can identify
The curve exists but nothing changes
Confirm Region, the exact controller entry and the channel. Then check the patch’s MIDI mapping. If notes play but CC11 does nothing, changing the audio driver is unlikely to answer that specific problem. Try a controller the instrument documents, or use its exposed parameter automation when that better matches the task.
CC7 moves Logic’s mixer fader
Look under File > Project Settings > MIDI > General. Apple documents the setting that makes CC7 and CC10 control channel-strip volume and pan, and warns that it can interfere with MIDI plug-ins and Smart Control mappings. Review whether this project needs that behavior before changing the setting. Do not delete a working control-surface setup as your first response.
Playback changes when you start in the middle
Play from before the phrase’s first controller event, then compare with starting later. In File > Project Settings > MIDI > Chase, inspect the relevant event options. Apple’s Chase Events explanation describes recovering events that began before the playback position. Do not enable every option indiscriminately: chasing notes can retrigger sampler loops at an unwanted point.
Notes keep sustaining
Inspect CC64 for a missing or misplaced pedal-up value, including data in overlapping regions. Preserve the notes while repairing the specific event. Deleting every controller message can also remove expression and modulation you wanted to keep.
Once the controller data is right, return to the Piano Roll editing guide for note timing and velocity, or the Create Music hub for the next part of the arrangement.


