How to Split a Track or Region in GarageBand
On a Mac, select the region, place the playhead and press Command-T; only selected regions split. On iPhone and iPad, drag the scissors Split marker down. Here is how to cut out a part or a whole section, avoid clicks, join pieces, move one to its own track and save it as a file.

To split a track in GarageBand on a Mac, select the region, move the playhead to the cut and press Command-T, or choose Edit > Split Regions at Playhead. Only selected regions split, so press Command-A first when you want to cut every track at the same spot. On iPhone and iPad, tap the region, tap it again, tap Split, then drag the scissors marker to the cut and drag it down.
I’d put every cut on a bar line or in a gap between phrases, because a cut through a loud note can click and GarageBand has no dedicated region-fade control to hide it. Below are the Mac steps, what a split does to MIDI notes, cutting a piece out of a region or a whole section out of the song, avoiding clicks, joining pieces back, moving a piece to its own track, saving it as a separate file, the iPhone and iPad steps, and when Logic Pro is the better tool for the job.
Which GarageBand split method fits your job?
One command splits a region, but what you’re trying to do decides the method. The steps below match GarageBand 10.4.14 for Mac, which needs macOS 15.6 or later, and GarageBand 2.3.20 for iPhone and iPad, which needs iOS or iPadOS 27. Both are free from Apple’s GarageBand Mac App Store page and the GarageBand page for iPhone and iPad.
| Job | Mac | iPhone and iPad |
|---|---|---|
| Split one region at one point | Select it, place the playhead, press Command-T | Tap, tap again, Split, drag the scissors marker down |
| Split every track at the same point | Command-A, then Command-T | Split each region in turn |
| Cut a part out of a region | Two splits and Delete, or the Marquee pointer in the Audio Editor | Two splits, then tap the piece again and tap Delete |
| Remove a whole section of the song | Arrangement marker, Delete twice | Split and delete it on each track |
| Join pieces back together | Edit > Join Regions (Command-J) | Select them, tap Join; blue regions can’t be joined |
| Move a piece to its own track | Drag it to a track of the same type | Drag it to a track with the same Touch Instrument |
| Left and right channels, or vocals out of a mix | No command in GarageBand; Logic Pro does both | No command in GarageBand |
On a Mac I’d make every cut that runs through the whole song with arrangement markers, because one marker deletes the regions on every track under it and closes the gap, so nothing falls out of time. Splitting and deleting the same section on ten tracks by hand is ten chances to miss one.
How do you split a region in GarageBand on a Mac?
- Select the region. Click it in the Tracks area. Shift-click to add more regions, drag around several, click a track header to select every region on that track, or press Command-A (Edit > Select > All) to select every region in the project, as Apple’s region selection page lists. Selected regions look brighter.
- Place the playhead. Move it to the point of the cut. With Edit > Snap to Grid on (Command-G), the playhead snaps to the next grid position, and Apple’s Snap to Grid page says the grid value depends on the zoom, so zoom in for a finer step.
- Split. Press Command-T, choose Edit > Split Regions at Playhead, or Control-click a selected region and choose Split at Playhead.
The rule that trips people up is on Apple’s split regions page: “Only the selected region is split, even if a region on another track is under the playhead as well.” When several selected regions sit under the playhead, they all split. That’s the whole trick for cutting a full arrangement at one point: Command-A, then Command-T.
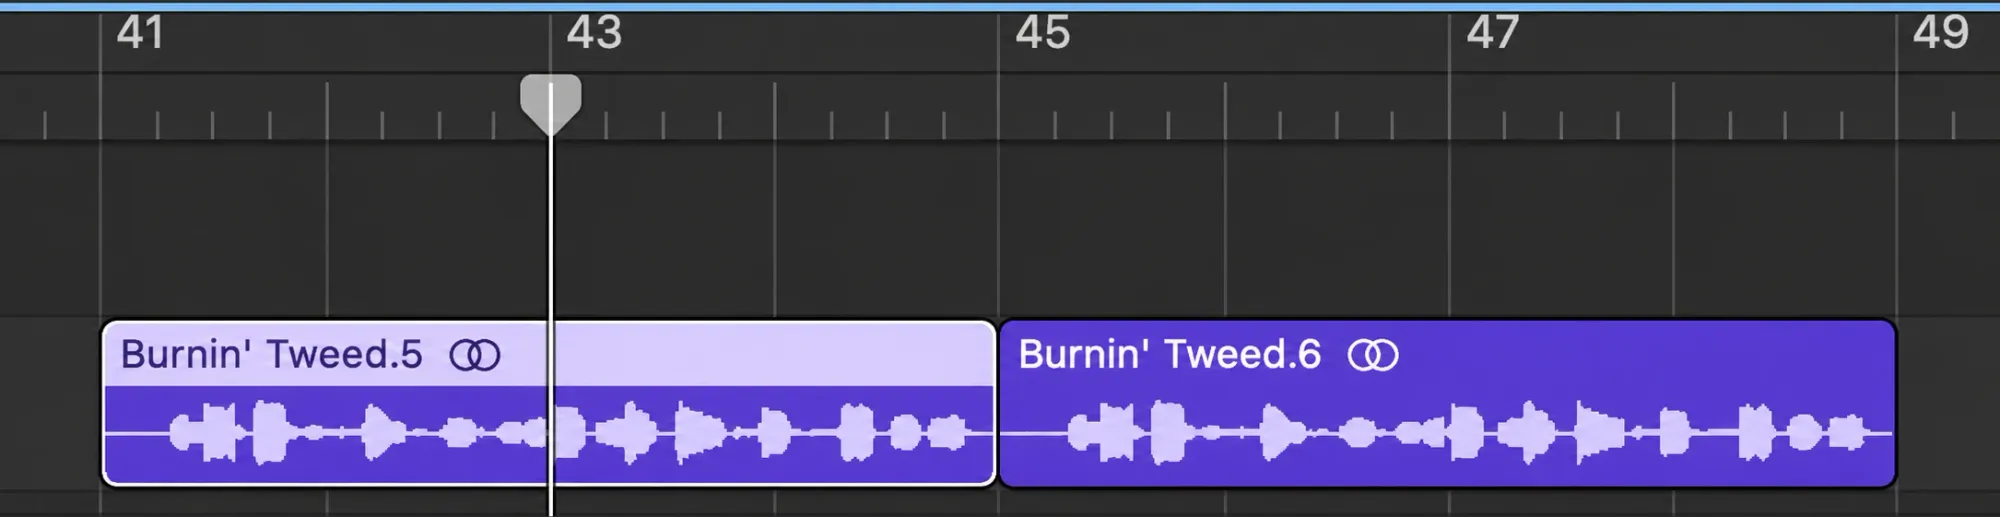
I’d leave Snap to Grid on for musical cuts, such as splitting at the bar before a chorus, and turn it off only when an audio cut has to land in a gap between words. The reason is what happens next: Apple’s move regions page says a moved region snaps to the nearest grid position, so a piece cut on the grid stays on the beat when you move or copy it later.
What happens to MIDI notes when you split a region?
They’re cut at the split. Apple’s split page says any notes at the split point are shortened to that point, and if notes in a split MIDI region overlap other notes by more than a 1/16 note, GarageBand opens a dialog asking whether to keep, shorten or split them.
A 1/16 note is short. With a quarter-note beat it lasts 15 divided by the tempo, in seconds:
| Tempo | One 1/16 note |
|---|---|
| 90 bpm | 166.7 ms |
| 100 bpm | 150 ms |
| 120 bpm | 125 ms |
| 140 bpm | 107.1 ms |
| 170 bpm | 88.2 ms |
I’d split MIDI regions in a rest, after the notes have ended, to avoid cutting through a held note. A bar line can still fall inside a sustained pad chord. If GarageBand offers Keep, Shorten or Split, choose how those overlapping notes should behave, then check the end of the first region and the first beat of the second before moving either piece.
How do you cut out part of a region?
Split twice and delete the middle. Put the playhead at the start of the part you don’t want and press Command-T, move it to the end and press Command-T again, then click the piece in the middle and press Delete. Apple’s delete regions page also lists Edit > Delete and Move, which moves the regions that follow in the track to fill the empty space.
I’d use Delete and Move only on a single-track recording, such as a voice memo or one podcast take, because it moves the later regions on that track alone. In a full arrangement that one track would then play ahead of the others.
For audio there’s a faster route in the Audio Editor. Apple’s Audio Editor page gives three steps:
- Get the Marquee pointer. Open the region in the Audio Editor and place the pointer over the lower half of the region. It changes to a Marquee pointer.
- Mark the part. Drag over the part you want. That part is split from the rest.
- Remove or move it. Press Delete, or move the pointer over the upper half of the region and drag the split part to another position.
To shorten from either end instead, drag the lower-left or lower-right edge of the region in the Tracks area with the Resize pointer, as Apple’s resize page describes; in the Audio Editor the Trim pointer’s help tag shows the region length and how much you’ve trimmed. The same Audio Editor page warns that moving or Option-dragging an audio region over another one cuts the overlapped part.
A split piece also makes a clean loop. Apple’s loop regions page says that when you loop a resized region, only the visible portion repeats. Split out one bar, Control-click it and choose Loop, and it repeats until the end of the project or the next region on the track; drag its upper-right edge with the Loop pointer to the point where it should stop instead.
How do you remove a whole section from a GarageBand song?
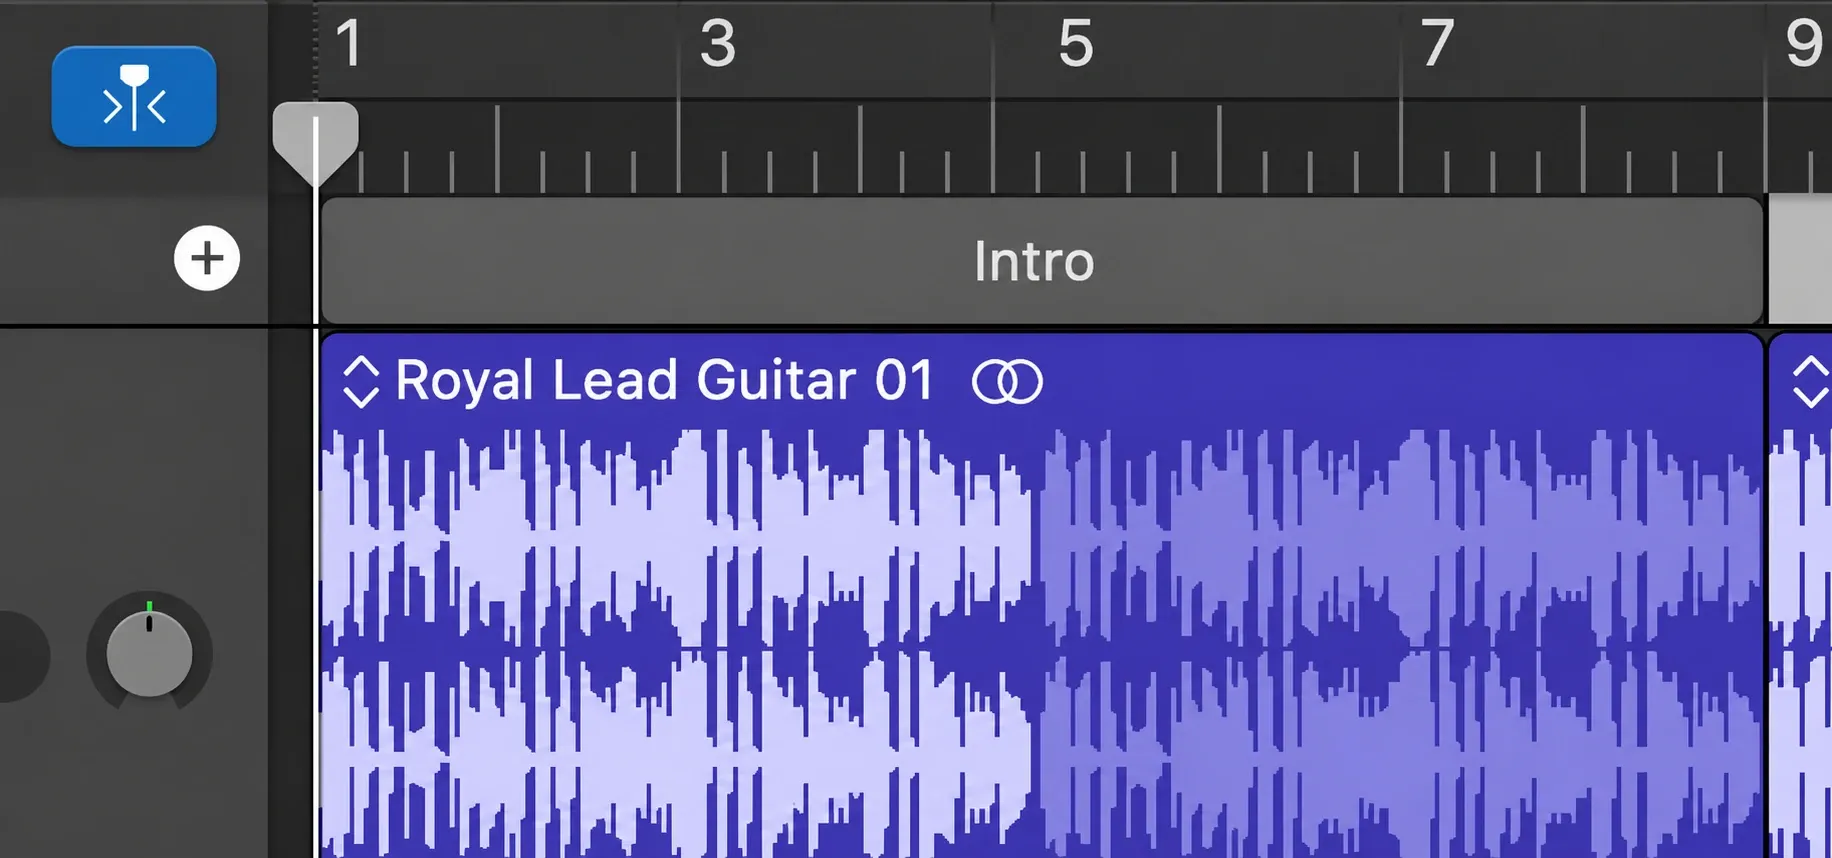
Use arrangement markers. They act on every track at once, and Apple’s arrangement marker editing page says the sections to the right close up the gap after a delete.
- Show the Arrangement track. Choose Track > Show Arrangement Track. It appears at the top of the Tracks area.
- Add markers from the start. Click the Add Marker button (+). Apple’s add markers page says the first marker begins at the start of the project, each new one starts at the end of the previous one, and a new marker is eight bars long. Drag each marker’s right edge to fit its section before you add the next, until one marker covers exactly the part you want gone.
- Unlock tracks. If any track is locked, unlock it first.
- Delete the regions. Click the marker and press Delete. Every region under it is deleted, on every track.
- Delete the marker. Press Delete again. The sections to the right move left and close the empty space.
If you know the section by time rather than bars, eight bars of 4/4 last 16 seconds at 120 bpm, 21.3 seconds at 90 and 13.7 seconds at 140. If the delete takes something you wanted to keep, Apple’s answer is Undo (Command-Z).
The same markers rearrange the song. Moving a marker moves every region in that section, including automation points; Option-drag copies it, so you can repeat a chorus; dragging one marker directly over another swaps them; and Command-drag over another replaces it. You can Shift-click several neighboring markers, but not ones with another marker between them.
How do you avoid clicks at a split?
Cut where the audio is quiet. A cut through a loud waveform can click, which is why Logic Pro has a Snap Edits to Zero Crossings setting that, in Apple’s Logic Pro zero-crossing page, “helps ensure that no ‘click’ or other unwanted sound is produced at the edit position,” and why Ableton Live applies a fade of up to 4 ms on clip edges “to avoid clicks” when Create Fades on Clip Edges is enabled, as its audio fact sheet explains. GarageBand’s Mac guide has no equivalent zero-crossing snap or dedicated region-fade control. Start with a quiet edit point; track-volume automation can also soften the boundary.
- Split in a gap. Between words, between phrases, or in the short silence before a drum hit.
- Get off the grid. Zoom in and turn Snap to Grid off (Command-G), so the playhead can sit in the gap instead of the nearest grid line.
- Slide a cut that landed wrong. Point at the upper edge where the two pieces meet. When the Junction pointer appears, drag left or right; Apple says both regions resize with no gap between them.
- Listen across every cut. Turn on Cycle (C) around the cut and play it a few times before you export.
I’d put the split in a quiet gap first. If no suitable gap exists, press A to show automation and select Volume in the track header. Use automation points to make a short volume dip to silence at the cut and return to the original level on either side, then listen for clicks or an obvious dip. This affects the whole track at that moment. I’d move the edit to Logic Pro when it needs independent region fades or a crossfade.
How do you join split regions back together?
On a Mac, select the regions and choose Edit > Join Regions (Command-J). Apple’s join regions page sets the limits: untransposed audio regions and MIDI regions can be joined, but regions from audio Apple Loops and transposed audio regions can’t. Audio regions must be adjacent on the same track; MIDI regions can be on the same track or adjacent tracks.
| Region | Mac | iPhone and iPad |
|---|---|---|
| Recorded or imported audio | Yes, if untransposed and adjacent on the same track | No (blue regions can’t be joined) |
| Audio Apple Loops | No | No (they’re blue) |
| MIDI or Touch Instrument regions | Yes, on the same track or adjacent tracks | Yes, on the same track with nothing between them |
| What you get | Audio: a new mixdown file; MIDI: the first region’s name and track | One region on that track |
The audio join is nondestructive: GarageBand writes a new file, which Apple calls a mixdown, and it replaces the original regions. Joined segments of compressed files are converted to AIFF. When MIDI regions have different Transposition, Velocity or Dynamics settings, those values are written in as data changes and the joined region’s parameters are set to neutral defaults.
I’d leave split pieces of an imported MP3 unjoined unless an edit really needs one region, because the joined file is uncompressed. At 44.1 kHz, 16-bit stereo, uncompressed audio takes 10.58 MB per minute against 1.92 MB for a 256 kbps MP3, about 5.5 times as much, so a three-minute song grows from about 5.8 MB to about 31.8 MB.
On iPhone and iPad, Apple’s iPhone region editing guide asks for regions on the same track with no other regions between them. Touch and hold the first region, tap the others while you hold it, then tap one of the selected regions and tap Join. Its note is blunt: “You cannot join blue regions.” Blue covers Audio Recorder and Amp recordings, imported audio and audio Apple Loops. Joined yellow Drummer regions take the settings of the first region.
How do you split one track into several tracks?
Split the region, then move the pieces. GarageBand moves regions between tracks; it doesn’t split a track’s channels.
- Split where each part starts. Command-T at every change, for example where the second singer comes in.
- Make a matching track. Select the track and choose Track > New Track with Duplicate Settings, or Control-click the track header and choose the same command, as Apple’s create tracks page shows.
- Drag the piece down. An audio region moves only to another audio track and a MIDI region only to another software instrument track, so the duplicate track is always a valid target.
The second track then gets its own volume, pan and effects. On iPhone and iPad, drag the region to another track with the same Touch Instrument; Apple also allows moves between Keyboard and Sampler tracks and between Audio Recorder and Amp tracks, but not from one Smart Drums track to another.
Two jobs people search for aren’t in either GarageBand guide: splitting a stereo recording into left and right, and pulling vocals or drums out of a finished mix. Logic Pro does both. Its Channel Mode button set to Left or Right makes the channel strip act as a mono channel with only that side of a stereo file playing, per Apple’s channel strip input format page, and our mono vs stereo tracks guide goes further. Stem Splitter extracts vocals, drums, bass, guitar, piano and other parts on Macs with an M1 or later chip, as Apple’s Stem Splitter page says; our Logic Pro Stem Splitter guide goes deeper.
How do you save a split piece as its own file?
- Mark the piece. Select its regions and keep Cycle off, or drag left or right in the top part of the ruler over the piece. Apple’s cycle area page says that sets a yellow cycle area and turns Cycle on; drag its edges to adjust it.
- Open the export dialog. Choose Share > Export Song to Disk.
- Limit the range. Select the “Export cycle area, or length of selected regions (if Cycle is turned off)” checkbox.
- Pick the format. Choose AAC, MP3, AIFF or WAVE and a Quality setting, then click Export.
Apple’s export to disk page says the result is a stereo audio file and that silence at the beginning or end is trimmed. The selected regions set the time range, not the tracks, so everything that plays in that range ends up in the file. Solo the track first if you want it alone.
I’d use the cycle area rather than selected regions, because the yellow strip shows the exact range in the ruler while you listen, and the selected-regions option only works with Cycle off. When you want every track as its own file, Logic Pro does that in one export, as our guide to exporting stems from Logic Pro shows.
How do you split a region on iPhone and iPad?
- Select it. In Tracks view, tap the region.
- Open Split. Tap the region again, then tap Split.
- Place the marker. Drag the Split marker, the one with the scissors icon, left or right to the cut.
- Cut. Drag the Split marker down.
To cancel, tap anywhere outside the region before you drag the marker down. For several cuts, move the Split marker to each part of the region and drag it down there. The iPad region editing guide gives the same steps as the iPhone guide.

I’d turn Snap to Grid off before splitting a recorded vocal on a phone or tablet and leave it on for loops and Touch Instrument parts. Apple says the setting is there to align regions with measures and beats, and that turning it off lets you line up a point that doesn’t fall on a beat division. To turn it off, pinch to zoom in to the maximum, lift your fingers and pinch to zoom in again; “Snap to Grid off” appears at the top of the Tracks area. Pinch to zoom out to turn it back on.
- Trim. Tap the region and drag the left or right edge of the frame; touch and hold an edge to zoom in. Blue regions can be shortened but not lengthened past their original length; green regions can go either way.
- Delete a piece. Tap it again, then tap Delete.
- Watch overlaps. A region moved over another deletes the covered part of the region underneath.
- Undo and redo. Tap Undo in the control bar; touch and hold Undo, then tap Redo.
- Paste audio from another app. GarageBand takes 44.1 kHz, 16-bit uncompressed audio, pasted to an Audio Recorder or Amp track.
When should you move the edit to Logic Pro?
When the cut needs a zero-crossing snap, a fade on the region itself, stems or one side of a stereo file. In Logic Pro, choose Snap Edits to Zero Crossings from the Snap pop-up menu in the Audio Track Editor; add a fade on the region edge, covered in our Logic Pro fade guide; and use Stem Splitter or Channel Mode for parts and channels as described above.
Logic opens GarageBand projects, as covered in moving a GarageBand project to Logic Pro. The edits from this guide carry over to splitting, trimming and joining regions in Logic Pro, where you can also close the gaps between regions after a cut, and Logic’s own arrangement markers are in our guide to arranging a song in Logic Pro. More edits like these are in the recording and editing hub.
GarageBand split FAQ
What is the shortcut to split in GarageBand?
Command-T on a Mac, the same as Edit > Split Regions at Playhead. Command-J joins regions again. On iPhone and iPad, tap the region, tap it again and tap Split.
Why won’t GarageBand split my region?
Usually the region isn’t selected. Only selected regions split, even when another region sits under the playhead, so click the region or press Command-A first. Also check that the playhead crosses the region, because only selected regions under the playhead split.
How do I cut out part of a song in GarageBand?
For one track, split at both ends of the part and delete the piece between. For every track, show the Arrangement track, cover the part with an arrangement marker, select it and press Delete twice; the rest of the song moves left to close the gap.
Can GarageBand split a stereo track into left and right?
No. Neither GarageBand guide has a left and right split. In Logic Pro, set the Channel Mode button to Left or Right to play only that side of a stereo file, or use Stem Splitter on an M1 or later Mac to separate vocals and instruments.
Why can’t I join regions in GarageBand?
On a Mac, regions from audio Apple Loops and transposed audio can’t be joined, and audio regions must be adjacent on the same track. On iPhone and iPad, blue regions can’t be joined at all, and the regions you join must be on the same track with nothing between them.


